Matt Jones Tech
  • Blog
  • Video Projects
  • Web Projects
  • Failed to Build Nettle6

    Hey guys, I was trying to build a copy of Local by Flywheel on Manjaro Linux, but ran into this error… ‘ Failed to build nettle6 ‘

    failed to build nettle6

    nettle6 is a dependency of Local, but after the attempted build of the package, I got the error failed to build nettle6 :

    ==> Verifying source file signatures with gpg...
        nettle-3.4.1.tar.gz ... FAILED (unknown public key F3599FF828C67298)
    ==> ERROR: One or more PGP signatures could not be verified!
    Failed to build nettle6

    If you happen to come across this error, just double check the key by running

    gpg --recv-key F3599FF828C67298

    Just plug in the gpg key from the error at the end of your gpg --recv-key call.

    In my case, that didn’t work. The resulting output was:

    ~ >>> gpg --recv-key F3599FF828C67298                                          
    gpg: keyserver receive failed: General error
    ~ >>>     

    If you’re like me and the key validation still fails, you can try a different key from another server using the --keyserver flag. For example:

    gpg --keyserver pool.sks-keyservers.net --recv-key F3599FF828C67298

    In my case, it shows that the new key was successfully imported.

    ~ >>> gpg --keyserver pool.sks-keyservers.net --recv-key F3599FF828C67298   [2]
    gpg: key F3599FF828C67298: public key "Niels Möller <[email protected]>" imported
    gpg: Total number processed: 1
    gpg:               imported: 1
    ~ >>>                                                                          

    Now, when I run the nettle6 package build again… it works! Hope this helps. There’s a great resource on this on the Manjaro forums.

    Again, this is a very specific error and solution, and it just so happened that I was having trouble with my gpg keys. This may not be the case for everyone, but I hope this article is helpful to you.

    matt

    September 21, 2020
    Linux
    arch, linux, manjaro, package manager
  • Open In Unity Not Working

    Open in Unity Not Working

    I’m trying to download some assets from the Unity Asset Store, but clicking ‘open in Unity’ is not working. Chrome prompts me with an “XDG-Open” dialogue. Even after selecting “ok”, nothing happens.

    So far, there are lots of complaints about the Unity Asset Store and how the only way to download some simple PDFs is via a giant, several GB Unity Editor.

    Regardless, if you just want to download some assets for learning like I do, I found a simple workaround:

    Open up the Unity Hub:

    Click Learn:

    Then Select the project you’d like to check out, and hit “Download”:

    The biggest problem with this workaround is that it only works for learning assets. I can’t seem to find a way to download assets that wouldn’t typically be categorized under ‘learn’. If anyone has any suggestions or ideas, feel free to let me know!

    By default, the project landed in my /tmp/ folder. Simply save the project to any location you like from inside the Unity Editor, or copy the contents of /tmp manually. Here’s some more information on how to copy projects. Hope this helps!

    Feel free to check out my first game! Thanks for stopping by.

    UPDATE:

    It appears that this issue is fixable. There’s a solid chance my xdg-open tool is not configured to open Unity when I click the “Open In Unity” link. I’m investigating further via these resources:

    https://askubuntu.com/questions/18418/how-to-set-which-application-is-launched-by-xdg-open

    https://askubuntu.com/questions/18418/how-to-set-which-application-is-launched-by-xdg-open

    matt

    August 4, 2020
    Game Design, Linux, Manjaro
    game design, games, linux, manjaro, Unity, Unity Asset Store
  • I Created an RFID Check-In Prototype With a Raspberry Pi

    All the technical details (and more awesome pi projects!): https://pimylifeup.com/raspberry-pi-rfid-attendance-system/

    RFID Check-In on a Raspberry Pi

    Hey guys! What’s going on my name is Matt and today I’m not doing a museum update and I’m not doing a 3d house model those
    are two other projects that are crazy and I’ve been doing other stuff and so…


    This video is for one of the projects that fell through the cracks if I don’t
    make a video about it no one will ever know that I did it so let’s do it!

    So a while back somebody came to me and asked me to do a project for a small like a kids ministry thing at church and they needed a way to get kids checked in and have like an account for each kid on this app, right… And so they needed to play games on the app and they you know keep they earn points and all this kind of stuff to kind of keep track of all of everybody’s stuff. So the first phase of creating this app I thought will they have these bracelets that have RFID tags on them and so if you could use that to track the kids and keep track of how many points they have each. That might be a good starting point so I created an RFID chicken system as a prototype for the app that never happened so here you go:

    Alright guys, so the very first thing that I grabbed was a Raspberry Pi and an RFID reader writer module so I can read the the actual tags themselves. So once I got those things together, I started to work on the wiring of the RFID module to the Raspberry Pi itself. And so that was put together with a breadboard and if you guys want some more information on exactly how that’s all rigged up there’s a link and in the description. And so once I had all the wires run from the RFID module to the Raspberry Pi it was time to boot up. And so once I booted up I was able to create two Python files and save them in a special RFID directory inside of the Raspberry Pi.

    So the first one is called read and it does just what you might expect it to it will read the identification number on the RFID tag and so every single tag that is created has an ID number and so the read function inside of the script will print out that number and any other information that’s written to that particular tag if nothing else is written it will just print the ID so
    that is the script for reading the tags and then there’s a second script that is
    write PI and it does the same exact thing except for your writing additional
    information to the tag so in order for the scripts to function you need to
    execute them so first off I’ll just execute the read function so once you
    execute it it’s going to enter a like a listening mode so when it detects an
    RFID tag that has been tapped to the sensor it will say okay I see the tag
    and here’s the ID number any other additional information written to that
    tag and in order to write to the tag you just execute the right program and then it’ll ask you to enter a little bit of text or whatever information that you want to associate with that particular tag so for my example I just put a string of text that says it is written and then once I wrote that to the tag I
    was able to read that information back and output that to the terminal.

    Alright guys thanks for hanging out if you want to know more about this RFID reader writer I have some more information and technical details and wiring diagrams and all that good stuff in the link below and hope you guys enjoyed this one we’re gonna be neck we’re gonna be back next time probably on home design 3d animation need things but I’d like to
    get back on the museum train that’d be great so we’ll see how it goes
    and I’ll see you guys next week peace out!

    matt

    May 12, 2020
    General Computing, Linux, Raspberry Pi
    attendance, check-in, DIY, python, raspberry pi, rfid
  • Failed to Commit Transaction (Conflicting Files) Manjaro

    How to fix Failed to Commit Transaction (Conflicting Files) Error in Manjaro Linux

    This error is usually thrown after an attempted package upgrade using either pacman, the GUI, or another package manager. Below is an example of the error:

    This can happen with pretty much any package, depending on what else you’ve got installed on your system. Basically, pacman is saying it can’t go through with the upgrade because there are some conflicting files that exist on your machine that is preventing the upgrade from progressing any farther. Here’s what you can do to solve this.

    Step 1

    Check to see which package owns the file in question. You can do this by running pacman -Qo /path/to/the/file. If that prints out the name of a package, then you will have to decide whether or not to uninstall the package with the conflicting package by using sudo pacman -R nameOfThePackage.

    Step 2

    If the file in question is not owned by any package (as was the case for my situation), you can simply delete the file in conflict. You can do this by running sudo rm /path/to/the/file. Once the file has been removed, you’ll need to run the update process again to confirm that all the conflicting files in question have been resolved.

    To find out more about this issue and similar issue when updating packages, feel free to check out the pacman troubleshooting guide on the Manjaro wiki site.

    If you want to use the package manager to install DaVinci Resolve, check out this post

    matt

    May 5, 2020
    General Computing, Linux, Manjaro
    arch, linux, manjaro, package manager, troubleshooting
  • How to Fix Unable to Lock Database Error in Arch Linux

    How to Fix Unable to Lock Database

    When I try to update my machine by running sudo pacman -Syyu I get an error saying it’s unable to lock the database. Below is an example:

    But as you may have noticed, by removing a special database lock file, I was able to solve the issue. You can do this with sudo privileges by running:

    sudo rm /var/lib/pacman/db.lck

    The above method is dangerous

    I’ve done this before, and it’s worked perfectly fine with no issues. But the reason the db.lck file exists is to ensure that only one program can run updates at a time. This prevents partial updates, or interrupted updates, or conflicts, or any other problems that can occur when two programs try to do the same update at the same time.

    So before you go deleting your db.lck file like I did, do yourself a favor and make absolute certain that there are no other programs trying to update anything. You can use the lsof command to check what other programs are using the db.lck file. lsof is short for “list open files”.

    The lsof command will either return nothing or a single number. If it returns nothing, that means that no process is currently using that file. If it does return a number, then that is the ID of the process currently using that file. In order to delete the file safely, you’ll need to kill that process first. You can do that by running sudo kill -9 <process_id>

    Hope that helps! Please leave a comment below if you have any questions. You can find more information on using the command line, check out this awesome book called The Linux Command Line. It’s free!

    matt

    April 28, 2020
    General Computing, Linux, Manjaro
    arch, linux, manjaro, package manager, troubleshooting, ubuntu, update
  • How to Use Yubikey on Linux

    How to Use Yubikey on Linux

    Initial Setup:

    1. Download the YubiKey Manager. This will allow you to modify specific properties of your key, and turn certain features on or off.
    2. Once you’ve installed the manager, you’ll need to make sure that you have U2F mode enabled on your key.
    3. Next, download or create a copy of a special rules file provided by Yubico. It can be found on their Github repository: https://github.com/Yubico/libu2f-host/blob/master/70-u2f.rules. Once you have the file, copy it to /etc/udev/rules.d/. If you already have a file in that directory named 70-u2f.rules, make sure that the content looks like the file from the Github repo.
    4. NOTE: If your version of UDEV is lower than 188, you’ll need the old rules file instead. If you’re unsure of your UDEV version, simply run sudo udevadm --version in a terminal.
    5. Save your file, then reboot your system.
    6. Make sure you’re running Google Chrome version 38 or later. You can use your YubiKey in U2F+HID mode starting in Google Chrome version 39.

    Additional Tools:

    Yubico provides a proprietary 2FA authentication tool that enables use of the key with services such as Protonmail. It can be downloaded from their site.

    Another tip:

    If you’re having trouble getting your YubiKey to show up on Linux (I’m running Manjaro), you’ll want to make sure you’re running a service called pcscd. To run it, just open a terminal and run sudo systemctl start pcscd. Keep in mind, that will only start the daemon running. If you reboot your computer and stick your YubiKey in later, it won’t be recognized unless you start the pcscd daemon on boot. You can do this by running sudo systemctl enable pcscd. This will create a symlink to the pcscd.socket file, and it should start the daemon on boot. Once you’ve done that, you’re good to go!

    June 2023 update:

    Running a fresh install of Xubuntu on an Acer Chromebook, I was able to use Yubikey at Google sign-in on Firefox with zero Yubikey-specific package installs, no drivers, and largely out-of-the box. It would seem that none of the work described above is required anymore

    matt

    March 31, 2020
    General Computing, Lifestyle, Linux
    2FA, cybersecurity, lifestyle, linux, security, yubico, yubikey
  • How To Pause and Resume FFMPEG

    How to Pause and Resume FFMPEG

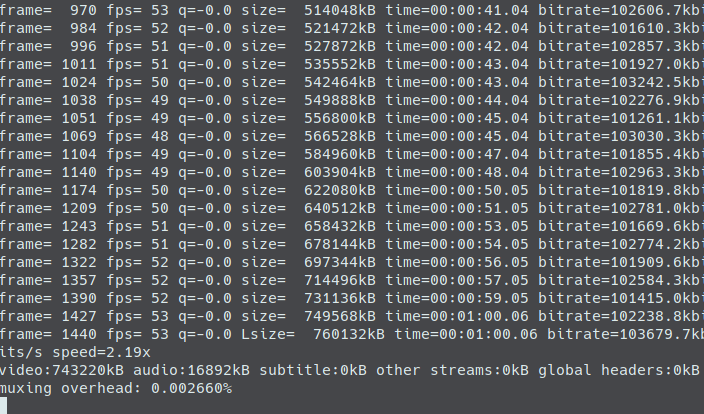
    This is the story of how I learned how to pause and resume ffmpeg. I’m a pretty big multitasker when it comes to computing. I usually end up with a few hundred tabs open when I’m browsing and I always have a terminal open. Last week I was doing a job using Davinci Resolve.

    In order for me to complete the job, I needed to convert about 60 or so .MTS files into Apple ProRes .MOV files. The entire project contained over 10 hours of content, and every file needed to be converted.

    So I employed my fancy batch script to loop through all the .MTS files in a given folder, transcode them one at a time, and output them to another folder. Such an aweseome script, and I use it very often. But eventually, the way I was working through the project, I ran into a problem.

    I needed to render a timeline out of Resolve, but my resources were already being used on this massive batch render. So how do I solve this problem?

    TLDR; Here’s the Answer

    It pretty much comes down to managing your Linux processes. If you’ve got a lot going on, and you need more control over which process gets the most resources, you have full control over that. And by the way, this trick can be used for ANY Linux process, not just FFMPEG!

    Typically, if you have a running process in a terminal window, you can kill it using CTRL+C. That will kill the process, and you’ll have to start the whole command over again if you want to resume the task. So if I hit CTRL+C in the middle of my ffmpeg transcode… I’d end up with some finished files, a half-encoded file, and an incomplete batch. That sucks.

    But there’s a different command that just stops the process instead of killing it. Basically pausing it in its current state, waiting for you to do something else. CTRL+Z is that magic command. This will pause a running process and send it to the background, and assigns that process a number. This will also return control of the terminal window back to you.

    If you run a different task, then CTRL+Z, you’ll have multiple processes paused in the background, each with a number.

    To see all the paused background jobs, you can simply run jobs to see a list of paused jobs.

    Now that my running ffmpeg process is paused and in the background, I can render out that Davinci Resolve sequence without overloading my system. Awesome!

    The fg Command

    Okay, now my Davinci Resolve render is complete! I’ve delivered that sequence, but I need to continue my batch encode so I can finish the rest of the project. To bring that ffmpeg process back to the foreground and pick up where I left off, all I have to do is use the fg command.

    The fg command can either take a job number as a parameter, or no parameter at all. If you don’t specify a job number, it will bring the default job [1] to the foreground and continue running that job.

    That’s it!

    The bg Command

    If you have a running process that you want to keep running, but regain access to the terminal input, you can simply hit bg. That’ll keep the process going, but send it to the background. Just remember- CTRL+C doesn’t work on background processes. In order to kill it, you’ll need to bring it to the foreground with fg.

    matt

    March 24, 2020
    FFMPEG, Linux, Video Editing
    ffmpeg, jobs, linux, processes, tasks
  • How to Add Swap in Manjaro

    How to Add Swap in Manjaro

    Hey guys! If you’re hear, you probably already know what RAM is and you’re excited to learn how to add swap in Manjaro. If not, this is sort of a follow-up post to how to download more RAM. Anyway, let’s get started!

    Using a Swap File

    There’s a ton of different ways to add swap to your system, some more advantageous than others. In my experience, it’s always been easier to add swap to an existing install by using a swap file. First, just confirm that you don’t already have swap enabled. To do this, just run sudo swapon. If that command does not return any output, then you don’t have swap enabled. Also, if you have and/or use htop, it will actually display your swap status right below your RAM usage bar. if it reads empty and 0/0kb, then you don’t have swap enabled. Great! Now we can add a swap file.

    Creating and initializing a new swap file

    To create an initialize a new swap file, we’ll be using the fallocate command. To initialize a 16GB swap file just run the following in a terminal:

    sudo fallocate -l 16G /swapfile

    then run: sudo mkswap /swapfile

    Setting permissions for your new swap file

    Manjaro will likely give you a warning about changing the permissions of your swap file. You can change permissions using the chmod command. The swap file should only be readable and writable by the root.

    sudo chmod 0600 /swapfile

    Enabling your new swap file

    Enable your new swap file by running the following:

    sudo swapon /swapfile

    Make your changes permanent

    Make sure Manjaro knows to use your swap file every single time it boots up. Do this by running:

    sudo bash -c "echo /swapfile none swap defaults 0 0 >> /etc/fstab"

    And that’s it! The only thing left to do is reboot and just double check to see if your swap is up and running. Again, you can just run those commands from the beginning of the tutorial swapon or htop and you should be good to go! Happy blending!

    matt

    January 8, 2020
    Blender, General Computing, Linux
    Blender, general com, linux, manjaro, RAM, swap memory
  • How to Remove a PPA via the Command Line

    How to Remove a PPA via the Command Line

    If you’ve used Linux for any amount of time, you’ve probably come across a PPA. A PPA is short for Personal Page Archive. If you’re looking for a specific piece of software not available in the official software store for your distro, you might look into adding a PPA. Most software that is offered via PPA includes the installation instructions to add their PPA and get everything installed. However, not every software includes instructions on how to remove their PPA and uninstall everything. In this tutorial, we’re gonna learn how to remove a PPA via the command line.

    Side Thoughts

    As far as I’ve heard on forums and StackOverflow and pretty much everywhere else, it’s typically not the best idea to install software using a PPA. I did it a few years ago when I was first getting into linux, but I don’t do it at all anymore. Generally speaking, PPAs aren’t the safest thing to be using and I really don’t have much need for them anymore. In fact, on of the biggest reasons I switched to Manjaro a while back was because of the massive AUR (Arch User Repository). There you can find a massive community of Arch users who have created a ton of software and configured it just for Arch. Still getting the hang of it, but so far it’s been amazing.

    Now for the Actual Tutorial

    If you happen to know the exact URL of your PPA, you can remove it by using the --remove flag:

    sudo add-apt-repository --remove ppa:otto-kesselgulasch/gimp

    Not that you’d ever remove GIMP! It’s an awesome photo manipulation program and it’s included in official software stores in most distros anyway.

    If you don’t know or can’t remember your exact PPA location, you can browse all the files in /etc/apt/sources.list.d/

    ~$ cd /etc/apt/sources.list.d/
    ~$ ls

    Once you find the PPA you wanna trash, just run:

    ~$ sudo rm nameOfThatPPA.list

    also, if you have a .save file paired with it, just trash it as well.

    ~$ sudo rm nameOfThatPPA.save

    matt

    January 5, 2020
    General Computing, Linux, Ubuntu
    linux, package manager, PPA, ubuntu, update
  • How to Install DaVinci Resolve 16.1 on Manjaro

    Method 0:

    The simplest and quickest way to get up and running with DaVinci Resolve on Manjaro is to simply open the default package manager that comes with Manjaro and searching for davinci-resolve. This will give you a few results, because Resolve comes in free and paid versions. If you want to install and use the paid version, search davinci-resolve. If you have an activation key or USB key for the paid version of Resolve, then just search for davinci-resolve-studio. Click on the package you want, click “Build”, type in your password, and you’re good to go!

    Method 1:

    This is likely the more common way to install Davinci Resolve 16.1 on Manjaro. Just head over to the official Blackmagic site to guarantee yourself the latest and greatest version of DaVinci Resolve. From there, you can register and download the latest .zip file. Once you unzip, the installation is pretty easy, just execute the file named “DaVinci_Resolve_{yourVersionNumber}_Linux.run”. That’ll launch an installation wizard that will walk you through the terms and conditions, licensing agreements, and installation process.

    The only catch with this method is that there’s a chance you might not have all the required dependencies in order to run Resolve on your machine. In order to avoid this… I’d recommend the second method.

    Method 2:

    Use the user-created AUR package. This can’t be found inside the “Add/Remove Software” program that comes with Manjaro, as it’s not an officially supported repository. However, as of the writing of this post, it’s up-to-date and appears to be pretty well maintained. To install DaVinci Resolve 16.1 on Manjaro using this method, there is one prerequisite. You’ll need a group of packages called base-devel and git. To install these, just run:

    sudo pacman -Syu base-devel git

    You’ll be prompted for your password, and pacman will automatically go and grab all the required packages you need. Once that’s done, go to the official AUR package page and find the GIT Clone URL (usually linked at near the top of the page on the left).

    Copy that link, because you’ll need it in just a second. Next, create a new folder in your home directory called Programs, and inside Programs, create a new folder called DavinciResolve. Next, open a terminal window in your newly created DavinciResolve folder, and type git clone and paste that URL you copied earlier like so:

    git clone https://aur.archlinux.org/packages/davinci-resolve/

    Once you hit enter, you’ll create a copy of the AUR repository on your machine. Inside your folder, there should be a file called PKGBUILD just for peace of mind, you can optionally run less PKGBUILD to take a look at the script, just to make sure that you’re pulling official copies of Davinci Resolve 16.1 from Blackmagic’s official website. Once you see the official URL in the code, you’re ready for the final step!

    To build and install DiVinci Resolve 16.1 on Manjaro, all you need to do now is run makepkg -si. That will begin building resolve, -s to sync your local repositories with the remote ones, and -i to install the packages once you’ve built them. And that’s it! You’re now running Davinci Resolve 16.1 on Manjaro. Have fun!

    matt

    December 11, 2019
    DaVinci Resolve, General Computing, Linux
    davinci resolve, linux, manjaro
Previous Page
1 2 3 4 5
Next Page

Prove all things; hold fast that which is good. 1 Thess 5:21