Matt Jones Tech
  • Blog
  • Video Projects
  • Web Projects
  • How to Use ffmpeg (The Basics)

    The Problem

    It all started when Premiere Pro started glitching out. When I was trying to import a simple image sequence, like I’d done a thousand times before, it only imported the first 25% of the frames. Everything else was missing. There was no inconsistency in the file naming convention. Everything was sequential. There were no missing frames. Premiere is just glitchy.

    The Workaround

    I came up with an idea for a workaround. Instead of importing an image sequence, what if I just concatenated all those image files into a ProRes MOV? That way I can just drop the whole thing into Premiere with no problems. I tried to get Adobe Media Encoder to do that, but it wasn’t the most intuitive experience of my life. Every time I tried to import a sequence, it only gave me the first frame, and ended up rendering frame 1 over the entire length of the sequence. Solution? FFMPEG.

    What is FFMPEG?

    Ffmpeg is a command line application that allows you to manipulate images, video, and audio. It does take some getting used to, but once you get the hang of it, it is WELL worth the time you put in to learn the basics of the application. I do want to emphasize just the basics, as ffmpeg and all of its options are pretty vast.

    As a 3D artist and animator, I deal a lot with image sequences. Unfortunately Premiere and other NLEs can sometimes glitch out and not give you what you want when you import a sequence. FFMPEG allows you to concatenate a series of images and encode those frames into a single video file with a codec and container of your choosing.

    If you have other open source video applications like VLC player or Handbrake, you might already have ffmpeg installed on your system. You can check by running this in the terminal:

    ffmpeg -version

    If you don’t have it, you can get it easily by running:

    sudo apt install ffmpeg

    Now that you’ve got ffmpeg, you can do TONS of stuff with it. There’s a giant list of commands or you can check out the man page:

    man ffmpeg

    You can convert video files as simply as:

    ffmpeg -i input.mp4 output.avi

    The Tricks

    ffmpeg is used to initialize the program, -i is used to set your input file(s), and you can add more options like scale, fps, codecs, bit rates, and more with a long list of options available. For my purposes, I usually want to take a folder full of .png files and convert them into an MOV file for editing. For that, I can just ‘cd’ into the folder containing all my .png frames, and run something like:

    ffmpeg -f image2 -pattern_type glob -framerate 23.976 -i cyclesShotFour_*.png shotFour.mov

    Let’s break that down. The -f tack lets you indicate a format. To see all available formats, just run:

    ffmpeg -formats

    It’s worth noting that formats are different than codecs. To view the massive list of codecs available in ffmpeg, just run:

    ffmpeg -codecs

    Easy, right? Next we told ffmpeg to grab all the .png files in the current working directory matching the pattern we defined. In my example, all my files were named cyclesShotFour_0001.png, cyclesShotFour_0002.png, etc. There’s quite a few ways to define a pattern, and you can learn more here. Once ffmpeg has all your images defined, all you need to set your framerate and other stuff you may want and you’re good to go! Tack -framerate defines your framerate. At the end, just type the name of your output file. That’s it!

    Some of the other options that wasn’t mentioned in the above example, that I use quite frequently is setting the bitrate and the codec. The tacks for those options are -b:v (bitrate for video) -b:a (bitrate for audio) -c:v (codec for video) -c:a (codec for audio). So let’s say I want to encode a bunch of .jpg files into a Apple ProRes MOV file. Clearly, the output won’t have audio, so we don’t have to specify any audio options.

    ffmpeg -f image2 -c:v prores -framerate 23.976 -b:v 6000k -pattern_type glob -i frame*.jpg output.mov

    Anway, there are tons of different things you can do with ffmpeg, and it’s an absolutely amazing tool. It saved my butt just last week! Have fun and keep learning.

    matt

    February 26, 2019
    3D Animation, Linux, Ubuntu, Video Editing
    audio, bitrates, codecs, encoding, ffmpeg, formats, handbrake, linux, media, postproduction, transcoding, video
  • Swap Memory: It’s Like Downloading More RAM

    How Do I Download More RAM?

    It’s kinda like changing the blinker fluid in your car. You can’t. You shouldn’t. I mean… stuff like that doesn’t exist. But, if you’re finding yourself in a situation where you are running shy on your current installed amount of RAM, is there anything you can do without hitting up Newegg for a few more RAM sticks? Luckily, you can! Read on to learn how to add swap memory in Ubuntu 18.04.

    Just recently, I tried rendering a complex Blender scene on my computer. Unfortunately it crashed before I ever saw the first tile start to render. Blender was all like, “ERROR: Out of Memory”. I tried rendering again, but this time I opened my system resources window and monitored the RAM usage. I have 16GB of RAM installed, and 2GB of swap. As the scene loaded, the RAM started climbing up to the top of the usage graph, hit the top, then the swap started filling up. They both hit the top, and Blender crashed again.

    Fortunately, there’s a somewhat hacky thing called swap memory. So instead of purchasing extra RAM for your machine and going through all the trouble of installing it, you can add “virtual RAM” with just a few lines of code. This swap memory is designed as a sort of fail-safe should your machine demand more RAM memory than is physically installed. My problem was I was exceeding both my physical and my swap memory limitations. By default, Ubuntu was giving me 2GB of swap memory, and I had 16GB of RAM installed, but the Blender scene I was trying to render required more than my physical plus swap total of 18GB.

    Step One: Check If You Have Swap Enabled

    I’m using Ubuntu 18.04, so I can check my swap status by running this in the terminal:

    sudo swapon --show

    If there’s no output after running that command, you don’t have any swap memory enabled. If you do have swap enabled, you should get something like this:

    NAME      TYPE      SIZE USED PRIO
    /dev/sda2 partition 1.9G 0B -2

    The swap information in Ubuntu (size and settings and all that) can be found in /swapfile. To enable the swap file, you’d run:

    sudo swapon /swapfile

    To learn more about the ‘swapon’ and ‘swapoff’ command, you can check out:

    man swapon

    Step Two: Disable Your Swapfile

    Before you edit your swapfile, you need to disable it, otherwise you’ll get an error that’s something like “ERROR: file in use”. To do this, disable your swap file by running:

    sudo swapoff /swapfile

    Step Three: Edit Your Swapfile

    You can edit your current swapfile (or add a new swapfile if you don’t have one) using the fallocate command. You can learn more by running “man fallocate”. To increase your swap memory, run the following command (and change the number of GB to your preference):

    sudo fallocate -l 50GB /swapfile

    Step Four: Re-Enable Your Swapfile

    The -l flag stands for ‘length’ which essentially adjusts how much swap you’ve got. Next, you’ll need to reactivate your swap file by running

    sudo swapon /swapfile 

    Step Five: Confirm Changes Were Applied

    That should give your as many GB of swap as you need! You can double check your swap memory by running the Ubuntu System monitor by running:

    gnome-system-monitor

    and click the Resources tab at the top. You should see your swap memory reflect (not exactly, but pretty close) the amount of swap that you set using the fallocate command.

    Swap = 46.6 GB

    Now you should be able to render huge scenes in Blender without buying more RAM! Woot!

    Just a disclaimer: This is more of a note for myself so I can go back and visit this later. If you spot anything wrong or catch some mistakes, feel free to let me know! Thanks.

    matt

    February 19, 2019
    3D Animation, General Computing, Linux, Ubuntu
    animation, Blender, blender 3d, computing, general computing, hack, memory, RAM
  • How to Make Realistic Trees in Blender

    This Christmas….

    This Christmas, I got a 3D graphics assignment. Sorry, I can’t say ‘This Christmas’ without singing it.

    Assignment received

    For this assignment, I was asked to create a look-and-feel animation that conveyed the spirit of Christmas in a general sense. The ending needed to focus on gift giving. First, I developed a concept that involved a gift box opening on it’s own with shafts of light bursting through it. Upon opening, the bow would untie itself and explode into a shower of fabric. The fabric would be so abundant we’d lose sight of everything else for a moment. Finally, the box would fall open to reveal the title inside.

    Obviously, this is a wildly ambitious sequence to create. It would require a ton of time to develop just the cloth sequence, let alone the rest of the animation. To date this project a little, this came at a time when Eevee was still in alpha. Cycles was my only realistic option coming from Blender. However, I ended up running a few test renders before moving in a different direction.

    https://twitter.com/actualmattjones/status/1052989719901028352

    Running out of time

    By the time I landed on the final Christmas tree concept, the deadline for this project was fast approaching. I needed a way to create a realistic Christmas tree and quick. Enter The Grove. This plugin fit a perfect gap in my production pipeline. The controls were very intuitive. After a few minutes of learning the basics of the parameters, I was able to generate branches, attach leaves, and animate a gentle breeze that rendered fast, even in Cycles.

    Here’s the final shot created specifically to be seamless 10 second loop:

    Of course, you can custom model a tree based on tons of references, but the ROI on the time and energy investment didn’t make sense in this instance. Plus, The Grove’s controls make it easy to create virtually any design for a tree that you like! The plugin The Grove version 6, and was purchased for Blender 2.79. Just a few days after the project was completed, Blender 2.80 went into beta and I was automatically upgraded to The Grove version 7. Naturally, the plugin is thoroughly worth it, and if that doesn’t convince you, The Grove was used to create trees in Next Gen.

    So not only did The Grove save the day and help me create a great final product, it also gave me the speed and flexibility that this particular project required. The beauty of this plugin is that it’s not something I feel like I’ll use just once and never touch again. Trees and nature are so commonly needed in production I’m sure I’ll need them again. And what’s more, The Grove creates branches using a particle system. That means you can create one custom branch (e.g. one with a Christmas ornament hanging from it) and populate an entire tree instantly.

    matt

    December 24, 2018
    3D Animation, 3D Modeling
    3d, 3d animation, 3d modeling, Blender, christmas, christmas tree, graphics, The Grove 3D
  • The Gift (3D Animation)

    Flatlay photo to 3D animation

    This year’s Christmas graphic package was a collaboration between photography, arts-and-crafts, and 3D modeling and animation.

    Some of the items in preperation for the flatlay

    From Christmas Graphic to Christmas Animation

    Once we had a flatlay that was acceptable for print, we needed to use the same objects or similar objects that reflected the same style to bring an animation to life. So the next step was taking some of the real-life assets and modeling them from scratch.

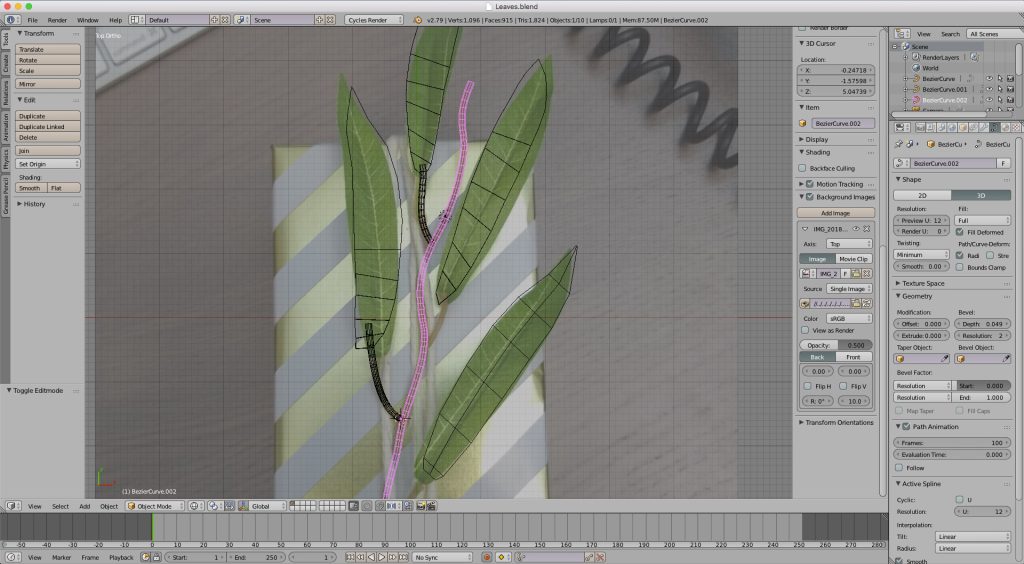
    Modeling leaves based on a real-life plastic plant

    Once the basic model for the plant was created, it was time to model and texture the gift box, as well as the ribbon. In fact, one of the ribbons in this project is available for download over on Sketchfab.

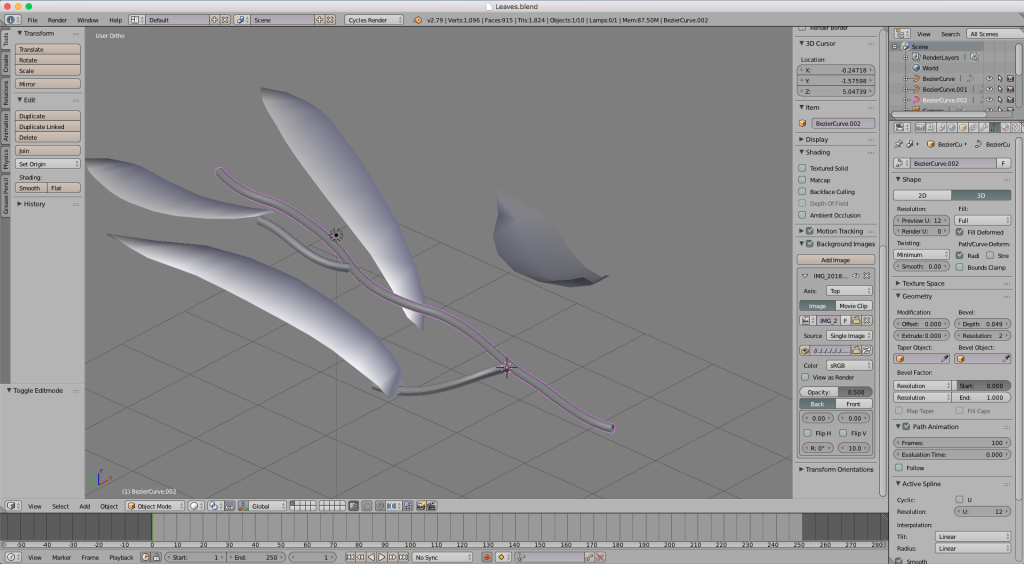
    Unshaded view of the plant decoration, mid-model

    Once all the assets were created, the only thing left to do was add a little animation to help bring everything else to life. I ended up adding a subtle ‘breathing’ animation to the Christmas tree, as well as some camera moves pushing through the scene.

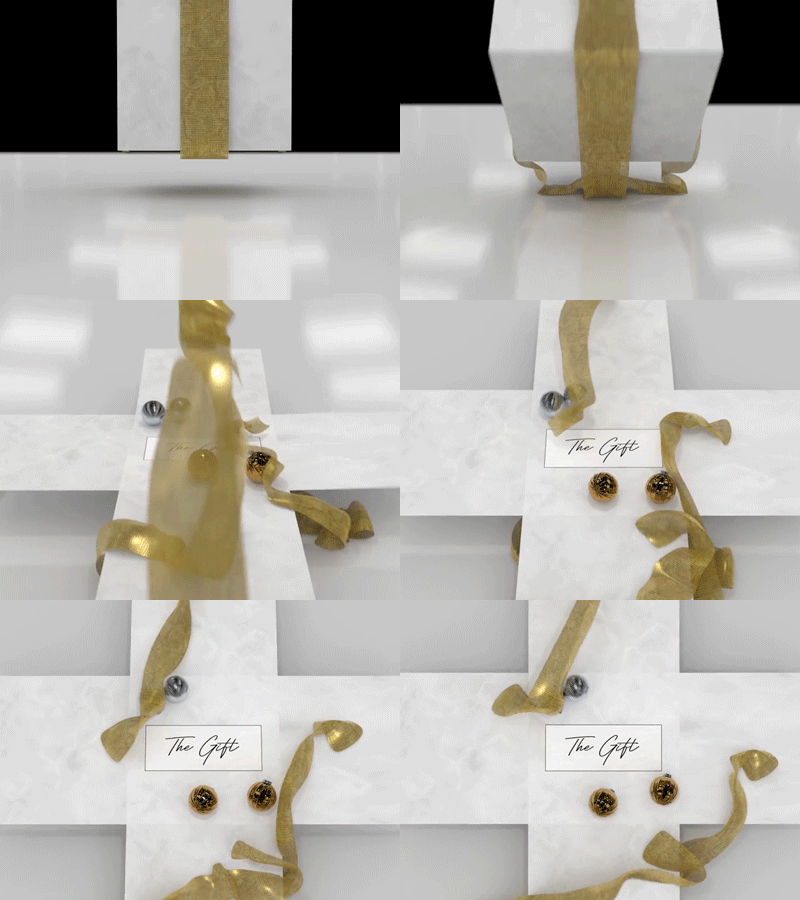
    Render Test that was trashed.

    Originally, I had envisioned a present box that sort of ‘exploded’ with ribbon flying everywhere. The ribbons covered the camera lens for just long enough to enter a small ribbon sequence. Finally, they will fall to reveal the logo inside the box with ribbon lying everywhere on the floor. Time constrains ended up preventing this original vision from ever seeing the light of day. Maybe next year!

    matt

    December 18, 2018
    3D Animation, 3D Modeling, Blender, Video Portfolio
  • A Brand New Add-on Ecosystem for Blender 2.8?

    With the highly anticipated release of Blender 2.8, there is one big question hanging in the air. What’s going to happen to the years and years worth of add-on development work put into versions 2.79 and earlier? The introduction of 2.8 is already groundbreaking in terms of shattering render times and giving artists the option of Cycles and Eevee to render their work, but 2.8 also shakes up Blender at its very core: the source code.

    The API rewrite for Blender 2.8 will essentially force all of the individual add-on developers to update their add-on to be compatible with version 2.8 and up. What does this mean for the end users? This could mean an open door for new developers to enter the world of add-on development for Blender, and potentially put pressure on the existing add-on developers who have contributed to version 2.79 and below.

    As new developers enter the scene, this could put pressure on existing add-ons, as the new tools have potential to be innovative, considering how different Blender 2.8 is from 2.79. This also has the potential to leave some add-ons abandoned, especially if they haven’t been updated in the last year or so. This new development environment also has the potential to push the existing add-ons that have been successful since 2.79 and below to new heights in 2.8.

    At the point of this writing, this is an exciting new world that has tons of potential in either direction it moves forward. Either the existing add-ons upgrade to 2.8 and remain amazing, new add-ons explode onto the scene and take advantage of brand new features unique to 2.8, or some mix of the two. Only time will tell what the future of 2.8 will be, but no matter what happens, the future promises to be a bright one. Rock on, and happy blending!

    matt

    October 24, 2018
    3D Animation, 3D Modeling, Compositing, Motion Graphics
  • Free Software That Could Replace Your Adobe Subscription

    If you’re like me, you’ve probably second-guessed how much you’ve shelled out to companies like Microsoft, Apple, Adobe, and others. It costs a great deal to be on the cutting edge of technology, and some software can set you back literally thousands of dollars. Seriously. Have you tried licensing a copy of Maya lately? Let’s check out some free software that could make you money.

    It took me a bit of testing out different software, but I think I’ve compiled a pretty decent list that, I’m personally convinced, with enough skill and creativity could completely replace Adobe Creative Cloud.

    Operating System

    First up, I’m going to start with the most basic. The operating system. Most people think computers fall into 2 categories: Mac vs PC. Well, PC just means ‘personal computer’ so… every consumer computer falls into this category, but- I digress. A great open source alternative to Mac and/or Windows is Ubuntu Linux. There’s TONs of documentation out there and a mega community who supports it.

    Update January 2020: I’ve been using Manjaro on both my work and home machines, and I find it much easier to set up out-of-the-box, and there’s much more support for my video editing applications. I write more about that here.

    Photoshop

    Photoshop is no doubt the industry standard when it comes to image retouching and manipulation. But few people know of a great open source alternative to Photoshop called GIMP. GIMP is an acronym that stands for GNU Image Manipulation Program. Kind of an unusual name, but a stellar piece of software available for free. An excellent choice for users who only need to do minor editing and retouching every now and again.

    Premiere Pro

    This one is a tough one, I’m not going to lie. Depending on how much video you need to edit, how big the project is, and how often you need reliable editing tools, there may not be much of a choice here. Just to be fair, this comment is coming from someone who makes his living and supports his family editing video. If that’s not you, Kdenlive is an excellent choice to edit just about any video you might need.

    Another piece of software on this list is Shotcut. It’s a little more scaled back as far as the technical capabilities, but it’s still able to do some basic edits. I haven’t logged more than a few hours in Shotcut, but it can handle basic edits for small applications like vlogs and home movies. If you need more technical control, I’d check out Davinci Resolve, or Kdenlive.

    Also, this one’s kind of an honorable mention, but just to be clear, this is NOT open source software, but it is excellent (the Hollywood gold standard) software in color correction, and more recently, video editing. It’s now available as free software that can be used with Mac, Windows, and Linux. That of course, is DaVinci Resovle. Definitely worth checking out.

    After Effects

    Again, another toughie, because of the way that this program operates. After Effects is a layer-based compositor, which is the only compositor that I am aware of that operates in this fashion. It makes sense when you view it as a part of Adobe CC as a whole, because Illustrator, Photoshop, Premiere Pro, Lightroom, and others are all layer-based. However, there are a few node-based compositors that are open source that I can suggest. The first, and definitely the most battle-tested is Blender. Easily the most powerful software I’ve ever come across. Another option would be Natron. Natron is more up-and-coming than Blender, but still something to keep an eye on.

    If you’re already checking out Davinci Resolve, then you’ll already have Blackmagic Fusion which comes bundled with Resolve. Admittedly, I have limited experience in Fusion, but from what I gather from coworkers and others who have used it, it’s more than capable for graphics and VFX. It’s a node-based platform much like Blender, Natron, and Nuke, so if you’re coming from a node-based platform, you should feel comfortable pretty quickly!

    Illustrator

    Illustrator is a great platform for creating vector art for use in large-format work like billboard design or design works that require your images to be flexible, such as a web environment. It’s is included in Adobe CC, but there’s also a great open source alternative called Inkscape. An amazing tool for creating vector art and logos, and available for Mac, Windows, and Linux.

    Audition

    Again, if you’re checking out Davinci Resolve, you’ll get another built-in program called Fairlight. My experience at the time of this writing is zero with Fairlight, but from my brief glances at the interface, it looks absolutely capable.

    Another powerful option is Ardour. Conveniently enough, Ardour is available to download and install via the Ubuntu Software Center.

    Missed Something?

    Drop a comment below, or shoot me a message, and I’ll add to this list!

    matt

    October 7, 2018
    3D Animation, 3D Modeling, Compositing, General Computing, Motion Graphics, Photo Editing, Video Editing
    3d animation, 3d modeling, compositing, computing, motion graphics, photo editing, video editing
Previous Page
1 2 3

Prove all things; hold fast that which is good. 1 Thess 5:21