Matt Jones Tech
  • Blog
  • Video Projects
  • Web Projects
  • Starting Pixel Art Character Design

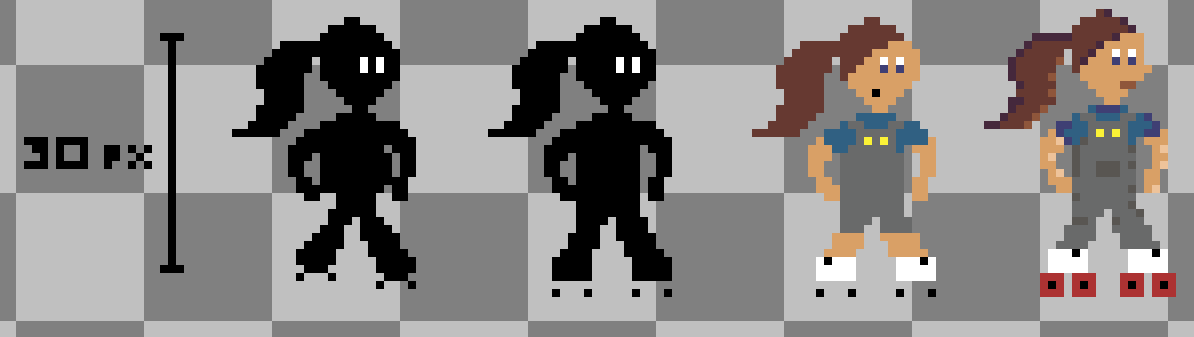
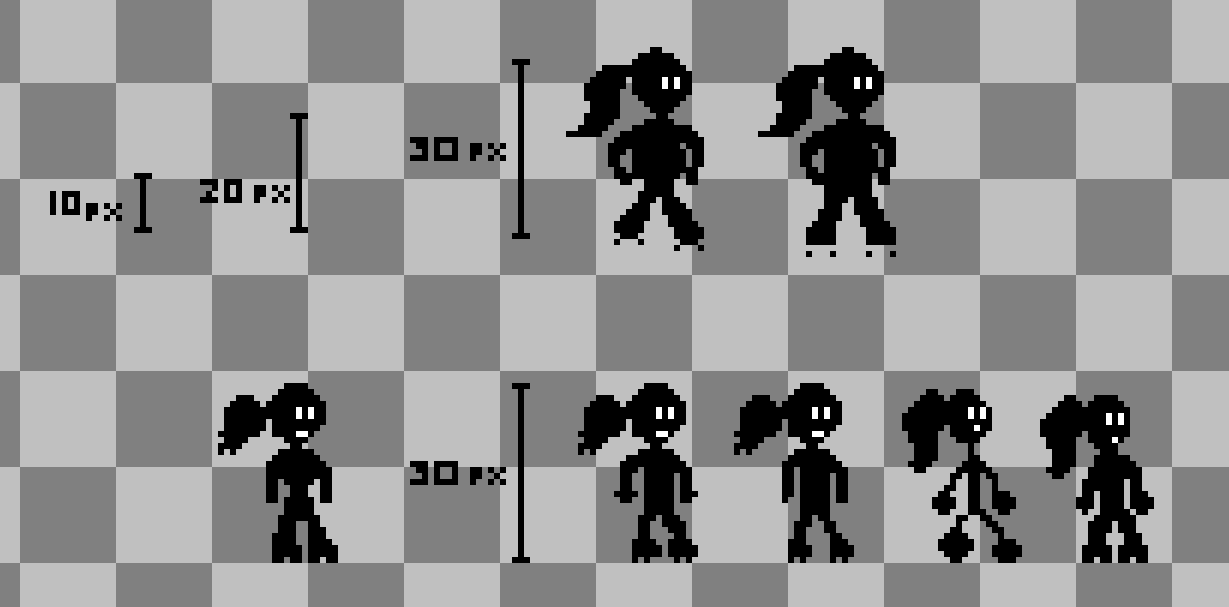
    Yesterday I began work on the first (of many) pixel art character designs that will be featured in the upcoming Light Quest arcade game. After some initial research, I found several pixel artists that recommended starting with a silhouette when designing a character. This achieves several things. First, it helps you create an iconic character that would be easily recognizable by its shape alone. It also helps create a clean design to help better feature the main attributes of the character. In the case of Light Quest, the main character named Willow, is a young girl around age 12 who is almost always seen wearing a pair of roller skates. So in the silhouette, I wanted to make certain that you were able to make out the fact that she was wearing roller skates.

    Level Select Screen

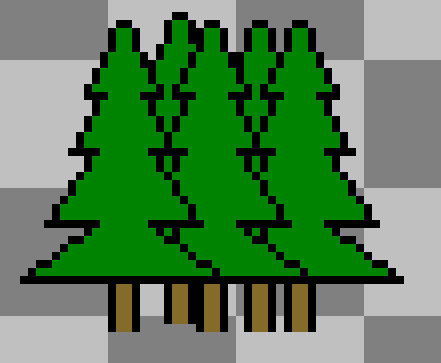
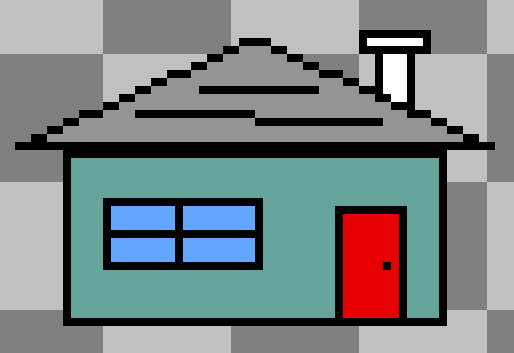
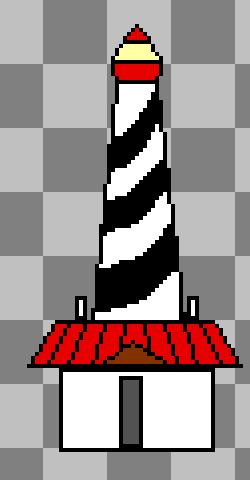
    In addition to beginning work on the initial character designs, I also began work on designing the various elements that will ultimately comprise the “Level Select” screen. This will be presented as a map of the town that Willow lives in. The icons that represent each level are a house, a pizza shop, a warehouse, a forest, and a lighthouse. The ground of the map (dirt paths, paved roads, sidewalks, and grass have yet to be developed, but will likely be designed separately. The idea is to have a top-down version of Willow’s sprite that will walk up, down, left, and right in order to ‘choose’ the level. Once Willow enters the level, it will switch to a side-scrolling platformer-style level design.

    Honing in the (Final?) Design

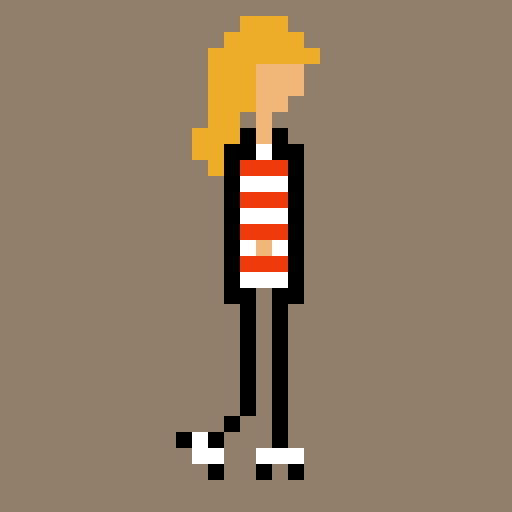
    I feel like it took me a long while (maybe around 2 days, while not working on it all the time) to get close to the design as present. My biggest pitfall was actually just starting! Once I had a few blobs put down I was able to make several iterations before I got stuck. After that, I just did the entire process again. Just put a few different blobs down, got a different main shape, then made a few iterations before adding color. All in all, I thought it was really fun! I’m looking forward to creating more characters in this new (to me) style.

    matt

    March 30, 2021
    Game Design, Graphic Design, Light Quest
  • The Museum: Update #2

    Progress update for my new web developer portfolio. Creating a 3D museum to showcase all my stuff from 10 years of film and video production. Final product will be a static HTML website that features a full screen 3D museum environment that the user can walk through and interact with.

    If you missed the first update and initial explanation, checkout the first one!

    Creating a Web Developer Portfolio

    As a new web developer, I’m looking for a unique way to showcase all of my skills that I’ve acquired over my 10 year career in visual media. I hope you guys like it!

    matt

    April 21, 2020
    3D Modeling, Graphic Design, Web Development
    3d modeling, b3d, Blender, web design, web development
  • How To Build Blender With Mantafow

    UPDATE:

    Mantaflow was pushed to Blender’s master branch on December 16, 2019. Now you don’t have to do all this stuff. It’s already in Blender by default! Hooray!

    Today Mantaflow landed in Blender's master branch! #fluids #b3d #simulation pic.twitter.com/CmVduFgVSN

    — Sebastián Barschkis 🌊 (@sebbas) December 16, 2019

    How To Build Blender With Mantaflow

    Here’s what I know about how to build Blender with Mantaflow. Some software engineers may laugh, but I’ve legit been trying to build Blender with Mantaflow for about a solid month (very off and on mind you, but still). If you don’t know what Mantaflow is or why it’s worth building a new copy of blender for… check out http://mantaflow.com/

    The capabilities of this new (in the Blender world, at least) method of calculating fluid and smoke simulations are insane. Unfortunately, it’s not available as a simple plugin, but you can grab it for FREE, if you’re not afraid of a terminal. (Also, I should note, there’s a new way to get FLIP fluids in blender and it IS a plugin, literally called FLIP Fluids, and it’s currently only stable for Windows and will set you back around $76) Regardless, FLIP fluids are highly efficient, and just all-around better than Blender’s default fluid/smoke simulator.

    So how to I do this? Step one: open a terminal. Don’t worry, it doesn’t bite.

    This is a screenshot of htop running in a linux terminal

    What You’ll Need

    First, you’re gonna need some tools before you can start building Blender with Mantaflow. If you’re on a Mac, there’s quite a bit of installing before you can actually start anything. For more info, check out this build guide for Mac OS Once you have Cmake and XCode development tools installed, you’re good to go. For Linux, you’re basically already good to go. Create a new folder in your home folder called blender-git.

    creating a folder named blender-git in the home directory

    Once you’re inside, clone Blender from the source.

    cloning the blender code from the source repository

    Next is the tricky part. Instead of continuing to follow the directions on wiki.blender.org, you’re gonna want to switch branches by running “git checkout fluid-mantaflow”. You should get a confirmation something like “successfully switched branches, you’re now on the fluid-mantaflow branch”

    NOTE: The Blender source code is always changing, so double check developer.blender.org to keep an eye on the latest branch development.

    checking out the mantaflow branch

    Install Dependencies

    Now you need to install/update dependencies for to build Blender with Mantaflow. You can do so by following the step 2 over on wiki.blender.org . All of the tedious installs that you had to do manually, one by one over on Mac can be done with one simple line in the Linux terminal (I’m not biased).

    updating packages, installing build packages

    Then there’s a special shell script that takes care of all your dependencies just by executing it. Simply run:

    running 'install deps.sh'

    Then you’re nearly ready! One last step! Make sure you can compile the code with Cmake by running:

    installing cmake

    Then you just need to make sure you’re inside the blender folder that was created when you cloned blender, and just run ‘make’.

    building blender with cmake

    if that doesn’t work, or if the build fails… try using the tag that sebbas suggests for compiling on Linux:

    building blender with custom build options

    And that’s it! Once the build succeeds, navigate to your build directory, cd into the bin folder and run ./blender

    Tada! Enjoy the awesome power of FLIP fluids for free!

    matt

    April 9, 2019
    3D Animation, 3D Modeling, Graphic Design, Linux, Motion Graphics
  • How to Create Seamless Patterns in Adobe Illustrator

    In this example, let’s say you want to create a seamless pattern in Adobe Illustrator using vertical stripes. First create a 1:1 artboard at any resolution you like. If you’re creating this for use in 3D, powers of two work best (1024, 2048, 4096, etc). Next, create your first stripe with a solid rectangle, and be sure to turn off the stroke.

    Single rectangle, no stroke.

    Next, ALT+Left Click and drag your rectangle so it snaps to the right edge of your original shape. This is a quick and easy way to copy/paste or duplicate an object, and move it around at the same time. Once you’ve done that, set the fill color for your next stripe. Continue this for as many colors as you want. I’ll do three.

    Three rectangles, snapped to each other, all different colors.

    Now, with all of your stripes selected, head up to the Object menu and click Object > Pattern >Make.

    I didn’t even know this existed!

    Once you click that, you’re brought into a special pattern editing view. From there, you can set specific parameters for your pattern. But by default, it’s seamless. By the way, this pattern (or swatch, as Illustrater calls it) is NOT square, and doesn’t have to be. We’ll get there. When you’re done, click done at the top.

    I just clicked ‘done’ at this point.

    After you click done, you’ll have a brand new swatch in your Swatches panel.

    Last step! Turn off your stripe template and grab the rectangle tool and drag it across your entire artboard. Make sure you’re snapping to both corners and holding SHIFT while you drag. Then, set your fill to that fancy new swatch you just made. Done!

    So stripey…

    Export it at whatever resolution you want, because vectors are cool like that. Hope this helped, hope you learned something new, and you’re rad. See you in the comments!

    matt

    November 12, 2018
    Graphic Design
    Adobe, graphic design, graphics, Illustrator, patterns, seamless, textures, vector art

Prove all things; hold fast that which is good. 1 Thess 5:21