Matt Jones Tech
  • Blog
  • Video Projects
  • Web Projects
  • Customize the Default WordPress Login Page Without Plugins

    Customize the Default WordPress Login Page Without Plugins

    Let’s take a look at how to customize the default WordPress login page without using any plugins.

    Changing the Logo

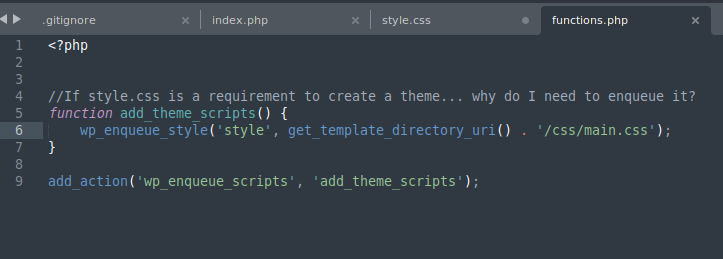
    First, open your functions.php file in your child theme and drop in the following function:

    function my_loginlogo() {
      echo '<style type="text/css">
        h1 a {
          background-image: url(' . get_template_directory_uri() . '/path/to/your/logo.png) !important;
        }
      </style>';
    }
    add_action('login_head', 'my_loginlogo');

    Just keep in mind that get_template_directory_uri() returns the root directory of your parent theme. To return the root directory of your child theme, use get_stylesheet_directory_uri(). If your logo is someplace else, like in your uploads directory for example, you can use the wp_upload_dir() function instead.

    A Note about wp_upload_dir()

    wp_upload_dir() actually returns an array, so if you call it in a function like this, expecting it to return a url or a file path, you’ll end up getting an error, and could potentially lock you out of your site.

    In my case, I’ve saved my logo in my uploads directory, so I used the ['baseurl'] item in the returned array. Here’s another example of what your image URL path could look like from the above function call:

    function my_loginlogo() {
      echo '<style type="text/css">
      h1 a {
        background-image: url(' . wp_upload_dir()['baseurl'] . ' path/to/your/logo.png) !important;
        }
    </style>';
    }
    add_action('login_head', 'my_loginlogo');

    Also, don’t forget to use single quotes inside your array selector for wp_upload_dir(). If you try something like wp_upload_dir()[baseurl], it won’t work.

    Change the Logo URL

    Now that you’ve got the custom logo loaded, you can have it link to anywhere with another functions.php call

    function my_loginURL() {
        return 'https://www.myawesomelink.com';
    }
    add_filter('login_headerurl', 'my_loginURL');

    Change the Logo Tooltip

    If you’re getting an annoying tooltip on your logo that says “WordPress” by default, you can change it like so:

    function my_loginURLtext() {
        return 'A Better Tooltip or nothing at all';
    }
    add_filter('login_headertitle', 'my_loginURLtext');

    Add Custom CSS

    Enqueue the new stylesheet, specifically for the login page like so:

    function my_logincustomCSSfile() {
        wp_enqueue_style('login-styles', get_stylesheet_directory_uri() . '/path/to/your/styles.css');
    }
    add_action('login_enqueue_scripts', 'my_logincustomCSSfile');

    Add Custom Link(s) Below Form

    function my_loginfooter() { ?>
        <p style="text-align: center; margin-top: 1em;">
        <a style="text-decoration: none;" href="https://www.myawesomesite.com/">If you have any questions, visit my awesome site
            </a>
        </p>
    <?php }
    add_action('login_footer','my_loginfooter');

    Bonus: Redirecting Users After Logging In

    function my_loginredrect( $redirect_to, $request, $user ) {
      if ( isset( $user->roles ) && is_array( $user->roles ) ) {
        if( in_array('administrator', $user->roles)) {
          return admin_url();
        } else {
          return site_url();
        }
      } else {
          return site_url();
      }
    }
     
    add_filter('login_redirect', 'my_loginredrect', 10, 3);

    Hiding or Changing the Login Page URL

    It should be noted that this isn’t recommended from a “security through obscurity” standpoint as elaborated on by the CEO of Wordfence.

    But if you still want to proceed, it’s pretty straightforward, again, without using plugins, just duplicate your wp-login.php file and name it something else like new-login.php. Inside the new file, you’ll want to run a search and replace for wp-login within that file and replace it with whatever you named your new login file. So in my example, you’ll run a search within wp-login.php and replace every instance of wp-login with new-login

    Next, you’ll need to register your new login URL in functions.php:

    /*
     * Change WP Login file URL using "login_url" filter hook
     * https://developer.wordpress.org/reference/hooks/login_url/
     */
    add_filter( 'login_url', 'custom_login_url', PHP_INT_MAX );
    function custom_login_url( $login_url ) {
    	$login_url = site_url( 'new-login.php', 'login' );	
        return $login_url;
    }

    Once you’ve dropped that in your functions.php and uploaded your new-login.php file, you’ll want to test your new login URL to ensure it’s working properly. If everything checks out, you can trash your original wp-login.php file.

    matt

    August 31, 2022
    Web Design, Web Development
  • Add Custom Fonts to a WordPress Site Without Any Plugins

    Add Custom Fonts to a WordPress Site Without Any Plugins

    Let’s dive into how to add custom fonts to WordPress without using any plugins.

    Choose a Font

    Originally, I was using a font called “Arrow” from DaFont. This actually ended up giving me problems later on, something I’ll cover later.

    Convert to WOFF2 (if you need to)

    Any font in the entire world. Just make sure it’s in a format that’s good for the web, like woff2. If your font isn’t already in woff2 format, there’s a really nifty command line tool to convert (compress, actually) your font into the preferred format before we get going.

    sudo apt update
    
    sudo apt install woff2

    Usage:

    woff2_compress [path-to-font-file]

    This command will automatically compress the file to .woff2 and name it the same as your input filename and place it in the same directory.

    Upload Font to Child Theme

    I just put it in the root directory of my child theme, under /fonts

    ├── fonts
    │   └── Almo_Andrea_FontlabARROW.woff2
    ├── functions.php
    ├── screenshot.png
    ├── style.css
    └── theme.json
    

    Enqueue Font

    Enqueue your font inside functions.php like so:

    function my_plugin_add_stylesheet() {
        wp_register_style( 'arrowFont', get_stylesheet_directory_uri() . '/fonts/Almo_Andrea_FontlabARROW.woff2');
        wp_enqueue_style( 'arrowFont' );
    }
    add_action( 'wp_enqueue_scripts', 'my_plugin_add_stylesheet' );

    Typically, in the past, you’d have to call a @font-face rule in your CSS in order to assign that font to various elements. Additionally, if you’re using a child theme to handle your fonts, in the past, you’d have to make rules for how to implement your custom fonts in addition to your @font-face rule. However, as of WordPress 5.9, the @font-face rule is actually handled via theme.json.

    Add Font To Any/All Blocks via theme.json

    In my case, I’m riffing off of the TwentyTwentyTwo theme, so in my child theme, I just copied over the theme.json file to make my modifications. In my case, I’m looking for where the default font is registered. I found it around like 170, but it’s gonna look something like this:

    "typography": {
    			"dropCap": false,
    			"fontFamilies": [
    				{
    					"fontFamily": "-apple-system,BlinkMacSystemFont,\"Segoe UI\",Roboto,Oxygen-Sans,Ubuntu,Cantarell,\"Helvetica Neue\",sans-serif",
    					"name": "System Font",
    					"slug": "system-font"
    				},
    				{
    					"fontFamily": "\"Source Serif Pro\", serif",
    					"name": "Source Serif Pro",
    					"slug": "source-serif-pro",
    					"fontFace": [
    						{
    							"fontFamily": "Source Serif Pro",
    							"fontWeight": "200 900",
    							"fontStyle": "normal",
    							"fontStretch": "normal",
    							"src": [ "file:./assets/fonts/source-serif-pro/SourceSerif4Variable-Roman.ttf.woff2" ]
    						},
    						{
    							"fontFamily": "Source Serif Pro",
    							"fontWeight": "200 900",
    							"fontStyle": "italic",
    							"fontStretch": "normal",
    							"src": [ "file:./assets/fonts/source-serif-pro/SourceSerif4Variable-Italic.ttf.woff2" ]
    						}
    					]
    				}
    			],

    In this section, you’ll want to update everything that needs to change to match what you’ve got going on in your child theme and whatever font you’ve chosen. In my case, I’ve updated “fontFamily”, “name”, “slug”, “src” and the “font-face” to match my font and child theme file paths.

    Once you’ve updated everything under “typeography”, now you can move on and update the “name” value for each of the blocks you want to use the new font on. By default the headers get their own font and it’s specified by the css variable var(--wp--preset--font-family--source-serif-pro). I changed the last bit with the slug that I set for my font, so my slug was arrow. My modifications looked like so:

    	"styles": {
    		"blocks": {
    			"core/button": {
    				"border": {
    					"radius": "0"
    				},
    				"color": {
    					"background": "var(--wp--preset--color--primary)",
    					"text": "var(--wp--preset--color--background)"
    				},
    				"typography": {
    					"fontSize": "var(--wp--preset--font-size--medium)"
    				}
    			},
    			"core/post-title": {
    				"typography": {
    					"fontFamily": "var(--wp--preset--font-family--arrow)",
    					"fontWeight": "300",
    					"lineHeight": "var(--wp--custom--typography--line-height--tiny)",
    					"fontSize": "var(--wp--custom--typography--font-size--gigantic)"
    				}
    			},

    Just keep updated the last part of that variable until you’ve changed all the blocks you’re trying to target with your new font. That’s it! Hope this helped someone.

    Potential Issues: Font Weight

    Something I’d like to note when you add custom fonts to WordPress… When you define your font inside of your theme.json, you’re required two things in order to register a font. From my understanding, these two requirements to register a font are actually coming from the CSS rule @font-face which requires a font family and a font weight attribute.

    If you were like me, and using a custom font that didn’t specify different weights within the font file itself, this can potentially be an issue. If @font-face can’t detect a font weight within the file inside of your src, then it won’t load the font and will use some default system fallback.

    To fix and/or avoid this issue, be sure to use a font that defines at least one font weight, and be sure to match that particular font weight within your @font-face call inside theme.json

    matt

    August 27, 2022
    Web Design, Web Development
  • Enqueue Stylesheets in a WordPress Block Theme

    Enqueue Stylesheets in a WordPress Block Theme

    Today we’re going to take a look at how to enqueue stylesheets in a WordPress block theme. My main stylesheet for a newly created custom WordPress block theme wasn’t loading after several tries and I couldn’t figure out what was going on.

    Every search result was just saying , “Oh, you gotta enqueue your stylesheet, just paste this code in…” but it never worked, even after replacing the parts where you had to specifiy the filename and filepath specific to the sheet you’re trying to load.

    The Root of My Problem

    After several tries, I finally figured it out. My problem wasn’t with wp_enqueue_style(), but rather get_template_directory_uri() and get_stylesheet_uri(), both of which are frequently used to enqueue stylesheets in a wordpress block theme.

    get_stylesheet_uri() returns the the actual file named style.css (required to have a theme)

    get_stylesheet_directory_uri() returns the filepath to the root of your theme directory (without the trailing slash), so example output would be yourdomain.com/wp-content/themes/your-theme-name

    And if that wasn’t enough, there’s one more bit of key information about get_stylesheet_directory_uri():

    In the event a child theme is being used, this function will return the child’s theme directory URI. Use get_template_directory_uri() to avoid being overridden by a child theme

    Anyway, all that said, if your stylesheet isn’t loading right off the bat, be sure to double check which functions you’re calling in addition to wp_enqueue_style() just to make certain you’re actually pointing to the stylesheet or JS file you’re trying to load.

    /*
    Theme Name: Twenty Twenty
    Theme URI: https://wordpress.org/themes/twentytwenty/
    Author: the WordPress team
    Author URI: https://wordpress.org/
    Description: Our default theme for 2020 is designed to take full advantage of the flexibility of the block editor. Organizations and businesses have the ability to create dynamic landing pages with endless layouts using the group and column blocks. The centered content column and fine-tuned typography also makes it perfect for traditional blogs. Complete editor styles give you a good idea of what your content will look like, even before you publish. You can give your site a personal touch by changing the background colors and the accent color in the Customizer. The colors of all elements on your site are automatically calculated based on the colors you pick, ensuring a high, accessible color contrast for your visitors.
    Tags: blog, one-column, custom-background, custom-colors, custom-logo, custom-menu, editor-style, featured-images, footer-widgets, full-width-template, rtl-language-support, sticky-post, theme-options, threaded-comments, translation-ready, block-styles, wide-blocks, accessibility-ready
    Version: 1.3
    Requires at least: 5.0
    Tested up to: 5.4
    Requires PHP: 7.0
    License: GNU General Public License v2 or later
    License URI: http://www.gnu.org/licenses/gpl-2.0.html
    Text Domain: twentytwenty
    This theme, like WordPress, is licensed under the GPL.
    Use it to make something cool, have fun, and share what you've learned with others.
    */
    

    Just a side note, apparently style.css that sits in the root of your theme directory exists for the sole purpose of registering the theme name, author, version, and all that. It’s never intended to hold the actual style code for the theme (I think).

    It might work for you, but the minute I tried to enqueue the style.css file that contained all the registration info, it immediately broke the entire site. Of course, I could have been enqueuing it incorrectly too. Anyway, just a thought.

    Enqueue Stylesheets Update (8/10/22):

    I recently discovered that putting all my child theme styles in an external stylesheet and enqueuing it from a subdirectory via functions.php has caused some strange issues for me when I try to use the Divi Builder.

    It appears that this method of loading child theme stylesheets prevents the CSS from loading in the visual builder.

    This issue has caused me to rethink my strategy when it comes to enqueuing stylesheets. I have since moved all my styling rules to the primary style.css (used to register the theme) and ditched the function call that enqueues the stylesheet from the child theme’s subdirectory. This move solved all the issues I was experiencing with the visual builder, but I’m still not sure what I was breaking and how I was breaking it.

    matt

    August 1, 2022
    Web Design, Web Development
    web development, wed design, wordpress
  • Z-Index Not Working Position Absolute

    Z-Index Not Working Position Absolute

    Today I learned about the importance of the natural stacking order. I spent probably an hour scratching my head trying to figure out why my element with the z-index of 500 wasn’t appearing on top of another element with a z-index of -500. At first I thought it might have something to do with my CSS position attribute not playing nicely with z-index, but it had everything to do with the order in which elements appeared in my HTML.

    As you can see in the example above, let’s assume the light grey rectangle is a <div> with the class of container or some encapsulating element containing three smaller elements on the same row. So, without any CSS positioning applied (relative, absolute, fixed, etc) these elements would naturally sit in this order from left to right.

    For whatever reason, my z-index values weren’t being recognized. Z-index 500 elements were being tucked behind z-index -500 elements. I think the issue was, returning to the illustration above, I was offsetting element #3 by so many pixels such that it would overlap (ON TOP OF) the element number 2. But the natural stacking order of the HTML actually put element #2 on top of #3. And with my z-indexes, that wasn’t the result I was expecting.

    So after a bit of research and trial and error, I actually changed the order of the elements and that was the trick that got me the result I was looking for.

    Hope this helps somebody in the future.

    matt

    July 11, 2022
    Web Design
  • Migrating a Site? Here are some tips to keep in mind

    At face value, moving a site from one host to another may seem pretty straightforward. Depending on what kind of site you’re talking about, this could be a bigger task than you’d expect. I just recently moved a site to a new host and ended up learning a few tricks that could hopefully help you down the road. To begin you’re going to need some basic access to the site in question. In my example, I’ll just be focusing on a WordPress site. A lot of these concepts and ideas can be carried over and applied to different sites of course, but there are some WordPress specific things to keep in mind when it comes to migration. WordPress can be a little, shall we say… “WordPressy”.

    Step 1: Buy Hosting

    This one may seem pretty obvious, but you’re going to want to secure some hosting in order to transfer your site to… well, somewhere. There are a few things to consider when going for hosting, and the type of site you’re migrating is going to have everything to do with the type of hosting you choose. If you’re migrating a WordPress site, then it would definitely make sense to go with a host that specializes in WordPress hosting. If you’re moving a site that is absolutely mission-critical and cannot afford any downtime whatsoever, then you’ll probably want to consider some dedicated hosting. Dedicated meaning you’re the only one on that server. If it’s more of a lightweight site that doesn’t demand a lot of resources, or if it’s more of a recreational site that’s just for fun, or if it’s just an experiment or something, then shared hosting makes more sense. Point being, get some hosting for your site, so you’ll be ready to start the migration.

    Step 2: Consider the Site’s Needs

    This kinda goes hand-in-hand with considering the type of hosting your site needs, but this step will focus more on what exactly the site in question is doing. What purpose does this site serve? Is it a blog? Is it a portfolio? Is it an e-commerce shop? Those questions will determine your next steps and how you should move forward.

    Once you’ve answered that first question, you’ll need to think about this: What is currently happening on the site that will need to continue happening? For example, if this is an e-commerce shop, are there active customers with a purchase history? Are there active subscriptions with a regular, automated renewal date? Think about all the stuff that will continue to happen on that site as time goes on.

    Step 3: Make a Full Copy of the Site

    There are quite a few variations and sub-steps associated with this step, but the main objective is to make a full copy of the entire folder structure of the site all the way to the root directory, as well as exporting a full copy of the database. Those steps look different for different websites, but those main concepts remain the same.

    For this example, we’ll focus on a WordPress shop. If you’re migrating to WPEngine, they make a great little plugin that does all the heavy lifting for you. Else, if you’re migrating to another host, doing a manual migration isn’t awful, but there are some critical things you’ll need to keep in mind to keep everything working and minimize downtime. However, just keep in mind, as a general rule, any migration of any kind will absolutely result in some downtime at the very least. The trick is to minimize that downtime and perform the migration at an off-hour when traffic is at the lowest.

    Step 3a: Export Your Database(s)

    If your current hosting provider gives you access to a cPanel, then you’re in business. From cPanel, navigate to PHPmyadmin, select your database(s), and export. If you’re working with MongoDB or another database, I’m not gonna lie, I’ve not exported databases from MongoDB before, but I’m sure it’s nothing StackOverflow can’t handle.

    Step 3b: Download Your Folder Structure

    Next, log into your backend via your favorite FTP client, and download your entire folder structure.

    Step 4: Create an Empty Database and Assign User

    If your new hosting provider gives you access to a cPanel, then awesome. From there, you should be able to easily create a new SQL database, create a new database user and password, and assign that user all privileges. If you have a password manager, you’ll want to use it to store these database credentials. You’ll need them for later.

    Step 5: Upload Your Folder Structure

    Once you’ve purchased a hosting plan with your preferred provider, you’ll have access to the server via some protocol (likely FTP or SFTP). Once you have a username and password for your FTP connection, go ahead and log in, and begin uploading the folder structure you just downloaded. Depending on the size of your site, this may or may not take quite a long time.

    Step 7: Edit Your wp-config File

    Now, dive into your wp-config file and modify the lines that define your database name, the database user, and the database password.

    define( 'DB_NAME', 'your-database-name-goes-here' );
    define( 'DB_USER', 'your-database-username-goes-here' );
    define( 'DB_PASSWORD', 'your-database-password-goes-here' );

    Step 6: Import Database

    At this point, you’ll need to log into your freshly created database and choose “import”. Feed it the .sql file you received when you completed Step 3a.

    Side note: if you have issues at this step, double check your PHP settings. Sometimes, if your database is massive and/or your max_post_size, upload_max_filesize, max_execution_time settings don’t allow enough memory or time to complete the import, the import will fail. These settings can be changed in several places, one being your wp-config file, (since you’re probably already in there)

    Step 8: Update Your DNS

    Now that you have two working copies of your site on two separate servers, the next step is updating your DNS. This will point your URL to the new server. Depending on your DNS provider, this could take anywhere from 10 minutes to 24 hours. Once the DNS updates and propogates across the internet, you’re ready for the next step.

    Step 9: Assess The Situation

    At this point, you should have two working copies of the same site on two separate servers. If you’re running WordPress, there are a number of plugins (like Jetpack and WooCommerce Subscriptions) that will recognize when they are on a duplicate site. A really cool feature of a lot of these plugins is that if they detect a duplicate site, they will disable themselves on duplicate sites. This will help mitigate the risk of duplicate sites running in parallel and doing everything twice (like automatically charging subscribers when their subscription is up for renewal)

    Depending on what your site is doing (especially automated tasks), it might be a good idea to shut it down ASAP before the old server has a chance to run automated tasks in parallel with the new server.

    Step 10: Make Sure You Have a Local Copy

    Depending on how you completed Step 3a and 3b, you may already have a local copy of your site. Some site migrations can happen directly between two remote servers (for example, if you use the WPEngine plugin, you won’t have a local copy). This goes for your database as well, don’t forget your database!

    Step 11: Cleanup

    Now that you have a local copy of your site, you can safely delete the site from the old server. This will prevent any potential issues with running duplicate sites on the internet, regardless of DNS.

    matt

    February 9, 2021
    Web Design, Web Development
  • Using WP_Query() to sort datetime meta_value

    Just like the title suggests, I’ve spent the last several hours struggling with meta_query to return CPTs based on some datetime picker meta_value. Let me explain my setup.

    I’m writing a plugin that stores data from a custom_post_type for gym classes with a handful of custom fields put into place using ACF. One of those custom fields is gym_class_date which contains the output from a jQuery datetime picker. Here’s a look at my broken code:

     $today = date(‘Ymd H:i:s’);


     $MJCalendar = new WP_Query(array(
    
     ‘post_type’ => ‘gym_class’,
    
     ‘posts_per_page’ => –1,
    
     ‘meta_key’ => ‘gym_class_date’,
    
     ‘orderby’ => ‘meta_value’,
    
     ‘order’ => ‘ASC’,
    
     //only return upcoming classes, not classes in the past
    
     ‘meta_query’ => array(
    
     array(
    
     ‘key’ => ‘gym_class_date’,
    
     ‘compare’ => ‘>=’,
    
     ‘value’ => $today,
    
     )
    
     )
    
     ));


     while($MJCalendar->have_posts()) {
    
     $MJCalendar->the_post();

    When I ran the code, the resulting output was… nothing. So what gives?

    I burned an entire Sunday scratching my head over this and I finally figured it out. Here was my problem:

    ACF always stores datetime values in an EXTREMELY specific way: 'YYYY-MM-DD HH:ii:ss'. And I mean specific. Even though earlier in my code, I defined $today = date('Ymd H:i:s');… it was just wrong enough to break literally everything. Turns out, 20210116 16:37:24 does NOT equal 2021-01-16 16:37:24.

    Adding some simple dashes to my $today = date('Y-m-d H:i:s'); declaration made everything magically start working again.

    That’s gonna do it for this post, I know it’s a bit of a short one, but it took me FOREVER to figure out this stupid detail. Note to self, and hopefully to you, when you’re comparing two  datetime values with a meta_query, for Pete’s sake, make absolutely sure that your format is perfectly the exact same as the format coming from the database. Otherwise, none of your comparison operators will work.

    matt

    January 8, 2021
    Web Design, Web Development
    code, php, wordpress, wp_query()
  • Divi Visual Builder Not Loading

    Divi Visual Builder Not Loading…

    Divi Visual Builder not loading? I recently installed Divi on a new server and realized that in doing so, I strangely couldn’t access the Divi Visual Builder anymore… The Divi Visual Builder just sat there and spun forever.

    Oh boy…

    So upon further inspection… I open up the console to see what was going on. To my surprise (or maybe unsurprisingly?) there were TONS of errors in the log. All of them were, in one way or another, pointing to the fact that:

    uncaught reference error: jQuery undefined

    jQuery undefined? What gives? The WordPress Core comes bundled with tons of JavaScript libraries… jQuery being one of them. So why can’t it be found?

    One solution suggested on the web was heading over to the Divi theme options and enabling the classic editor. Apparently there were a few issues with the transition to WordPress 5.0, the new Gutenberg editor, and compatibility with Divi… I haven’t experienced any issues since the transition to 5.0, but you can check out more info on that topic here.

    However, for my situation, enabling/disabling the classic editor didn’t work for me. I was still missing jQuery either way, and the Visual Builder was still just….

    Yeah.

    So here’s the solution that worked for me

    In my particular situation… I was running traffic to my WordPress server through Cloudflare. Not everyone does this, and it’s not always the source of many problems, but for this particular case, it was the issue for me.

    Inside my Cloudflare settings, I went to the Speed tab at the top:

    Then click ‘Optimization’ below that:

    And scroll about halfway down the page, and make sure that the Rocket Loader setting is disabled.

    After that, I was able to refresh my WordPress site, click ‘Enable Divi Builder’ and voila!

    Hope that helps! If you’re interested, check out more random solutions to random problems by visiting the rest of my blog

    matt

    September 27, 2020
    Web Design, Web Development
    cloudflare, divi, theme, wordpress
  • The Museum: Update 1

    The first update of who knows how many… Super excited to start a new project!

    matt

    April 15, 2020
    3D Animation, 3D Modeling, Blender, Web Design, Web Development
    3d modeling, b3d, Blender, portfolio, vlog
  • Mobile UI/UX Proof of Concept

    Prologue

    I will say, this project was born out of a strange, confusing, and quite frankly stressful time. My job description was very much up in the air, and and there was even uncertainty around this entire project. Unfortunately, this project never saw the light of day, but I have been searching hard drives all over the office to find this one and I finally found it! I just wanted to post it because I still really love the idea, and I will probably try and revisit the concept and try it on a special page here on mattjones.tech.

    Assignment

    The ask for this project was to create a web page that really engaged visitors and explained the concept of baptism along with various beliefs about baptism that were applicable to the church. Admittedly, a largely vague assignment with plenty of room for interpretation. So instead of creating a typical page design with images, I decided to take it up a notch.

    Concept

    The existing site was built on WordPress. The idea was to simulate a water splash in 3D, “freeze” the water in time, create some text blocks in and around the different areas of the splash, and animate a camera to stop at each of the text blocks. Once the splash and camera animation were created and in place, the objects, animations, and materials would then be imported into a ThreeJS scene. Once it’s imported to ThreeJS, the appropriate tweaks would be made to make the render look similar to what I had in Blender, then just animate the camera along a path based on scroll direction. Once that was complete, just paste that code block onto a WordPress page and you’re done!

    As you can see from the video above, I was able to simulate the water, block out some dummy text, and get the camera animations in place for a proof of concept. The next step would have been getting approval from the client, but unfortunately, the project was dropped before it could progress to the next stage. However, I’d love to just take this project all the way to completion just to see if it is even possible. In all honesty, this is a workflow I’ve never executed in a real world scenario, but conceptually, I can imagine all the technical bits coming together fairly seamlessly.

    Thoughts on Design

    Looking back on this rushed design, if I were to reattempt this project, I would probably design a completely vertical experience. This would more closely mimic the actual movement of being baptized, and give opportunities to stop at each stage of submersion and rise for explanatory blocks of text. A vertical design could also have a great opportunity to shine on mobile screens as well.

    Emphasis on Flexibility and Ease of Use

    The only thing I can anticipate rethinking would be the implementation of the text blocks themselves. “Real” HTML text blocks (“real” as in “easily editable”) would be extremely beneficial here, as it would meet the almost guaranteed need to modify the text later. And when you’re rendering a 3D world, live, right in the view port anyway, it makes sense to just implement live rendered, and easily editable text as opposed to Blender text objects converted to mesh for rendering in the page.

    matt

    October 18, 2019
    3D Modeling, Web Design
  • What is HTML?

    What is HTML? Hypertext Markup Language is the standard way to format text for use on web pages. So if you ever find yourself needing to edit a webpage or create one from scratch, this is the most basic way to display anything on a page.

    Basic Structure

    HTML is broke up into several different elements, noted by tags. You can write anything you want on your web page, but these tags are at the core of HTML and are used to give your text its structure. Tags are noted with angle brackets <> and wrap around the text that it affects. It should be noted that the tags need to go in a specific order, like so:

    <!DOCTYPE html>
    <html>
    <head>
    <title>Page Title</title>
    </head>
    <body>
    <h1>Heading</h1>
    <p>Paragraph text.</p>
    </body>
    </html>

    Let’s break that down. The first tag is <!DOCTYPE html> and that’s just a one-time declaration to help the computer understand that it’s about to read an HTML document. That way, it knows what to expect. You don’t need to close this tag.

    Next, it’s the <html> tag. Everything, the whole page, is contained inside this tag.

    The <head> tag is where you keep file path references associated files, like CSS files for styling, Javascript files for functions, and other page metadata like titles. The <head> tag closes with a forward slash and closes out all the page metadata before the <body> tag begins.

    Finally, the <body> tag surrounds the main content of your page. Inside this tag, you’ll find lots of tags like <p> (paragraph text), <h1> (largest header text) through <h6> (smallest header text), <ul> (unordered list AKA bullet points), <ol> (ordered list AKA numbered), <a> (anchor tag, used for making clickable links) and <form> for forms. There are several more, but those are some of the most common tags you’ll find.

    Why Tags?

    These tags server two main purposes. The first and primary purpose is to tell your web browser how to interpret all the text coming from a web page. Is it a title? A paragraph? A list? Table? This provides the overall structure of the page. HTML is often referred to as the “skeleton” of the web page. It’s functional, but not necessarily the most beautiful thing out there.

    Additionally, tags provide a great element that CSS files can use to apply style. So instead of applying a style to ALL text in an HTML document, CSS can select just the headings (<h1> tags) and apply styles to just the text inside those element tags.

    That’s it for the basics! There are tons of free online courses and videos out on the web to help help get to grips with the basics of web design and development. In this day and age with so much of our lives existing on the internet, it definitely doesn’t hurt to know some of the basics of how the web works.

    matt

    March 5, 2019
    General Computing, Linux, Web Design, Web Development
    computing, internet, linux, portfolio, web design, web development, website, wordpress

Prove all things; hold fast that which is good. 1 Thess 5:21