Matt Jones Tech
  • Blog
  • Video Projects
  • Web Projects
  • How To Pause and Resume FFMPEG

    How to Pause and Resume FFMPEG

    This is the story of how I learned how to pause and resume ffmpeg. I’m a pretty big multitasker when it comes to computing. I usually end up with a few hundred tabs open when I’m browsing and I always have a terminal open. Last week I was doing a job using Davinci Resolve.

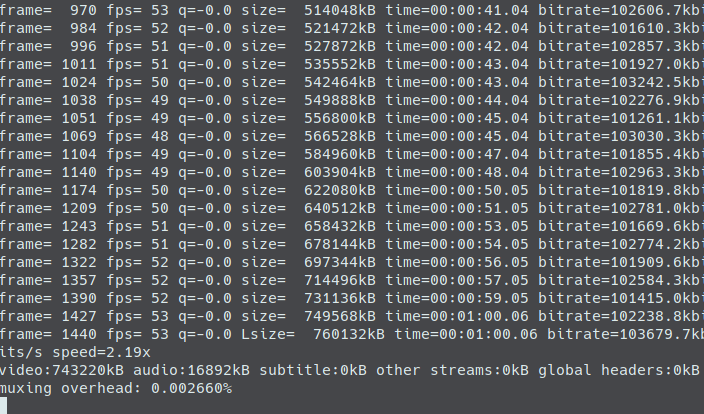
    In order for me to complete the job, I needed to convert about 60 or so .MTS files into Apple ProRes .MOV files. The entire project contained over 10 hours of content, and every file needed to be converted.

    So I employed my fancy batch script to loop through all the .MTS files in a given folder, transcode them one at a time, and output them to another folder. Such an aweseome script, and I use it very often. But eventually, the way I was working through the project, I ran into a problem.

    I needed to render a timeline out of Resolve, but my resources were already being used on this massive batch render. So how do I solve this problem?

    TLDR; Here’s the Answer

    It pretty much comes down to managing your Linux processes. If you’ve got a lot going on, and you need more control over which process gets the most resources, you have full control over that. And by the way, this trick can be used for ANY Linux process, not just FFMPEG!

    Typically, if you have a running process in a terminal window, you can kill it using CTRL+C. That will kill the process, and you’ll have to start the whole command over again if you want to resume the task. So if I hit CTRL+C in the middle of my ffmpeg transcode… I’d end up with some finished files, a half-encoded file, and an incomplete batch. That sucks.

    But there’s a different command that just stops the process instead of killing it. Basically pausing it in its current state, waiting for you to do something else. CTRL+Z is that magic command. This will pause a running process and send it to the background, and assigns that process a number. This will also return control of the terminal window back to you.

    If you run a different task, then CTRL+Z, you’ll have multiple processes paused in the background, each with a number.

    To see all the paused background jobs, you can simply run jobs to see a list of paused jobs.

    Now that my running ffmpeg process is paused and in the background, I can render out that Davinci Resolve sequence without overloading my system. Awesome!

    The fg Command

    Okay, now my Davinci Resolve render is complete! I’ve delivered that sequence, but I need to continue my batch encode so I can finish the rest of the project. To bring that ffmpeg process back to the foreground and pick up where I left off, all I have to do is use the fg command.

    The fg command can either take a job number as a parameter, or no parameter at all. If you don’t specify a job number, it will bring the default job [1] to the foreground and continue running that job.

    That’s it!

    The bg Command

    If you have a running process that you want to keep running, but regain access to the terminal input, you can simply hit bg. That’ll keep the process going, but send it to the background. Just remember- CTRL+C doesn’t work on background processes. In order to kill it, you’ll need to bring it to the foreground with fg.

    matt

    March 24, 2020
    FFMPEG, Linux, Video Editing
    ffmpeg, jobs, linux, processes, tasks
  • Transcode Files for Davinci Resolve 16

    Today I learned that you only have to transcode files to import them into the free version of Resolve. If you’re rocking the full version, then this shouldn’t really apply, unless you have an absolutely crazy file format on your hands.

    Didn’t We Already Cover This?

    So this stems off a previous blog post from a while back, where I was using ffmpeg to transcode some .MTS files (from a Panasonic/Sony camcorders similar to this) for use in Resolve on Linux. The code snippets from that post were okay… But not great. The biggest problem was that after transcoding, the file size often inflated… I mean DEFINITELY inflated. FFMPEG often defaults to the highest tier of quality in a given codec if you don’t take the time to specify exactly what you want.

    ProRes

    I really struggled with this because it’s easily argued that ProRes is the codec that is literally designed to be edited. So it’s great to just cut ProRes from the start, right? And I’ve been involved in a lot of professional workflows where the first step is to convert to ProRes. Sounds like a good idea. Except when you consider file size.

    Recently, I’ve been getting lots of projects involving mass quantities of footage. Often times I’ll get 3-5 hours of footage, climbing up to 60GB for a single project. Keep doing projects like that and I’ll have to start an Amazon subscription to hard drives… So I’m not in a place where I can afford to transcode 60GB of .MTS into 240GB of ProRes.

    MPEG4

    Luckily Resolve takes codecs other than ProRes! So I experimented a bit trying to figure out how to transcode a ton of .MTS files into something that Resolve can read, but without inflating the file size to something that’s nearly unusable. After a bunch of trial and mostly error, I came up with a pretty good preset. I even saved it as a text file so I can reference it later and use it in bash scripts.

    So here it is, mostly for my own reference so I can go back here and copy it again:

    ffmpeg -i "file.MTS" -c:v mpeg4 -b:v 20M -c:a pcm_s24le /output/destination.mov

    I’ve also tested this export setting with .MOV files that came from an iPhone and didn’t play natively with Resolve. I just converted them using the snippet above, and they played back perfectly in Resolve. Plus with the variable bitrate setting, the filesizes are VERY comparable to the original sizes. Often only off by a few megabytes.

    Enjoy, and happy editing on Linux!

    matt

    September 30, 2019
    FFMPEG, Linux, Video Editing
    editing, ffmpeg, linux, resolve, transcoding, video editing
  • Batch Process FFMPEG

    Batch Process FFMPEG

    An incredible use case for simple Bash scripting is the ability to batch process ffmpeg tasks. First off, I’ll assume you guys have got a basic understanding of FFMPEG, what it is, how to install and use it, that kinda thing. If not, feel free to check out the basics. FFMPEG is absolutely amazing. It can convert a chicken sandwich to ProRes. So once you’ve got the basic single-file convert down, how do you batch convert?

    Shell Scripts

    This is new for me, and I’m happy to learn new stuff. So upon a basic introduction, shell scripting looks incredibly powerful. I’m easing my way into Python because Blender is written in Python, but apparently Python is something you can integrate into shell scripts as well, so all the better!

    More good news, someone had the same issue as me, and got a pretty rad response on StackOverflow. The 2nd answer below the ‘correct’ one uses something called parameter expansion that I don’t really know a lot about. But from my limited understanding, I gather that it’s a way to take the existing filename and stick it on to the ffmpeg file export. So let’s say you have vacayFootage.avi that you want to convert to .mp4. Parameter expansion grabs the file name and sticks it onto the resulting export so you’ll get vacayFootage.mp4 without the hassle of having to name a thousand files by hand, each time you convert a file. So here’s an example of how you would batch process ffmpeg commands:

    for i in *.avi; do ffmpeg -i "$i" "${i%.*}.mp4"; done

    So like a true professional, I pasted that Stackoverflow answer into a shell script, modified the lines a bit to match my needs, and boom! It worked! I was able to convert about 500 files in just a few minutes with a single line of code… So awesome!

    So Many Possibilities…

    So with that fancy new script… and learning about how read is a cool Python command that can be used to collect user input… I’d love to write a shell script that can work for anyone. Just enter the directory where all your media is, choose your output options, select your output directory, and boom! Batch encodes for all! Gotta get on that… right after I learn Python.

    matt

    September 16, 2019
    FFMPEG, Linux, Video Editing
    bash, code, ffmpeg, file conversion, linux, python, scripting, shell
  • How to Use ffmpeg (The Basics)

    The Problem

    It all started when Premiere Pro started glitching out. When I was trying to import a simple image sequence, like I’d done a thousand times before, it only imported the first 25% of the frames. Everything else was missing. There was no inconsistency in the file naming convention. Everything was sequential. There were no missing frames. Premiere is just glitchy.

    The Workaround

    I came up with an idea for a workaround. Instead of importing an image sequence, what if I just concatenated all those image files into a ProRes MOV? That way I can just drop the whole thing into Premiere with no problems. I tried to get Adobe Media Encoder to do that, but it wasn’t the most intuitive experience of my life. Every time I tried to import a sequence, it only gave me the first frame, and ended up rendering frame 1 over the entire length of the sequence. Solution? FFMPEG.

    What is FFMPEG?

    Ffmpeg is a command line application that allows you to manipulate images, video, and audio. It does take some getting used to, but once you get the hang of it, it is WELL worth the time you put in to learn the basics of the application. I do want to emphasize just the basics, as ffmpeg and all of its options are pretty vast.

    As a 3D artist and animator, I deal a lot with image sequences. Unfortunately Premiere and other NLEs can sometimes glitch out and not give you what you want when you import a sequence. FFMPEG allows you to concatenate a series of images and encode those frames into a single video file with a codec and container of your choosing.

    If you have other open source video applications like VLC player or Handbrake, you might already have ffmpeg installed on your system. You can check by running this in the terminal:

    ffmpeg -version

    If you don’t have it, you can get it easily by running:

    sudo apt install ffmpeg

    Now that you’ve got ffmpeg, you can do TONS of stuff with it. There’s a giant list of commands or you can check out the man page:

    man ffmpeg

    You can convert video files as simply as:

    ffmpeg -i input.mp4 output.avi

    The Tricks

    ffmpeg is used to initialize the program, -i is used to set your input file(s), and you can add more options like scale, fps, codecs, bit rates, and more with a long list of options available. For my purposes, I usually want to take a folder full of .png files and convert them into an MOV file for editing. For that, I can just ‘cd’ into the folder containing all my .png frames, and run something like:

    ffmpeg -f image2 -pattern_type glob -framerate 23.976 -i cyclesShotFour_*.png shotFour.mov

    Let’s break that down. The -f tack lets you indicate a format. To see all available formats, just run:

    ffmpeg -formats

    It’s worth noting that formats are different than codecs. To view the massive list of codecs available in ffmpeg, just run:

    ffmpeg -codecs

    Easy, right? Next we told ffmpeg to grab all the .png files in the current working directory matching the pattern we defined. In my example, all my files were named cyclesShotFour_0001.png, cyclesShotFour_0002.png, etc. There’s quite a few ways to define a pattern, and you can learn more here. Once ffmpeg has all your images defined, all you need to set your framerate and other stuff you may want and you’re good to go! Tack -framerate defines your framerate. At the end, just type the name of your output file. That’s it!

    Some of the other options that wasn’t mentioned in the above example, that I use quite frequently is setting the bitrate and the codec. The tacks for those options are -b:v (bitrate for video) -b:a (bitrate for audio) -c:v (codec for video) -c:a (codec for audio). So let’s say I want to encode a bunch of .jpg files into a Apple ProRes MOV file. Clearly, the output won’t have audio, so we don’t have to specify any audio options.

    ffmpeg -f image2 -c:v prores -framerate 23.976 -b:v 6000k -pattern_type glob -i frame*.jpg output.mov

    Anway, there are tons of different things you can do with ffmpeg, and it’s an absolutely amazing tool. It saved my butt just last week! Have fun and keep learning.

    matt

    February 26, 2019
    3D Animation, Linux, Ubuntu, Video Editing
    audio, bitrates, codecs, encoding, ffmpeg, formats, handbrake, linux, media, postproduction, transcoding, video

Prove all things; hold fast that which is good. 1 Thess 5:21