So you wanna roll your own backup solution, eh? Sure you could pay for some premium solution, but who are you kidding, they’re just copying files back and forth. How hard could it be? In this article, we’re going to take a look at writing our own backup solution. While technically, this solution can be molded to fit any type of website, app, or software, this particular script will be focused on making copies of and backing up WordPress sites. Let’s get into it!
Prerequisites
This tutorial assumes you already have root access to your hosting server, and will be performed pretty much exclusively from within a bash shell (hence the title). You will need a few things in order to get started:
- SSH access to your host
- Permissions to write and execute your own scripts
- Permissions to install CLI tools on the server
- Some place to store your backups (and access to that place)
With regards to that last bullet point, this can be virtually any cloud hosting service (Google Drive, Dropbox, Amazon, etc) or even a custom backup server.
Step 1
Once you’re all logged in and got your permissions all set up, you’re ready to go. Go ahead and create a new file with your favorite text editor (You can do this locally and upload it when you’re done, but I just wrote this directly on the server by using this command):
vim ~/backup.shOnce you have your file opened, you can start off with a shebang, this tells the computer that this is a bash file and you should use bash to evaluate it:
#!/bin/bashThe first thing you’ll need is a place to temporarily store your backup files. Make sure you have permissions to access and write to this location, as you’ll be basing your entire backup out of this one folder. It can be anywhere, just so long as you can do stuff without permissions issues. For this example, we’ll be using /opt/backups/ but you can use any directory you like. Go ahead and make that backup directory if it doesn’t already exist:
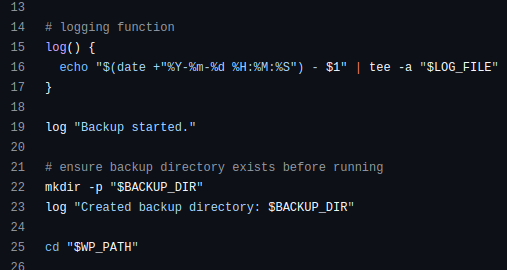
mkdir -p /opt/backups/Now that you have a temporary spot to keep the backup you’re about to create, let’s move into the root of the WordPress install so we can use wpcli to begin the process of making a backup. This can be located anywhere, but typically, WordPress installs are located in the /var/www/ directory, in a VPS or similar.
cd /var/www/example.com/Next, using wpcli, we’ll export the entire database with the db export subcommand like so:
wp db export /opt/backups/backup.sql
This is just an example, but the premise of this command is to generate a sql file that you can use to recreate the existing SQL database on another empty database somewhere else. The final argument of this command simply provides a full filepath and filename for the resulting SQL dump.
Next, we need to make a copy of everything inside of /wp-content/ and save it in our backup directory. Luckily, we can copy the complete contents of the /wp-content/ folder over to our temporary backup directory and compress everything in-transit all in one single command:
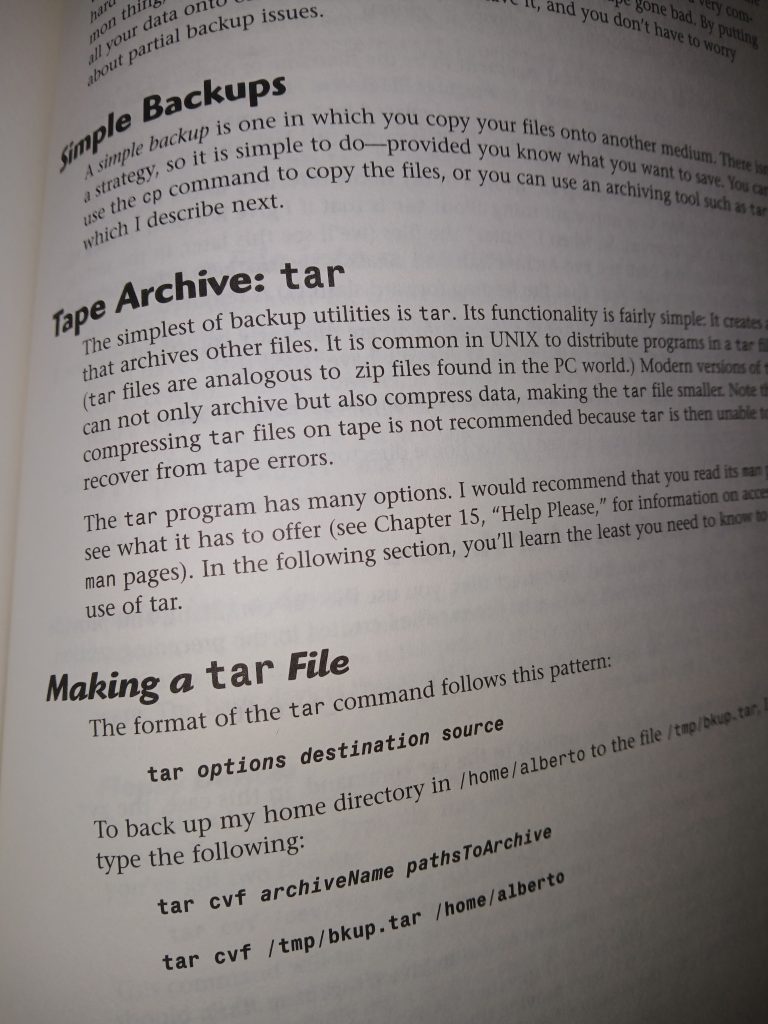
tar -cvzf /opt/backups/wp-content.zip -C /var/www/example.com/wp-content/If you’re familiar with the tar command, this should be pretty straightforward. If not, here’s a quick breakdown. tar is a LEGENDARY command. It’s the OG method for creating archives of virtually anything. From what I understand, it’s what the dinosaurs used to back up their blogs.

That’s right, tar is short for “Tape Archive”. I told you that’s what the dinosaurs used! After invoking the tar command, you can pass various options. The common options for creating an archive are cvf which stand for create, verbose file. Doing it this way would result in an archive ending in .tar but you can also pass the letter z as an option to format your archive into a more common .zip archive. You can also use tar to extract archives, but we’ll get into that later.
Let’s review Step 1 Because That Was A Lot
At this point, you should have lots of stuff in your bash file. It would probably be a great idea to save what you’ve got so far. First, we opened with a shebang and created our backup directory. Now, technically speaking, we would really only need to run the mkdir command once. So you could optionally exclude it from your script as long as you just create your backup folder once and have correct permissions for it, there’s really no need to keep creating a backup folder every single time you run this script in the future.
Next, we used wpcli to export the database and save it in our backup directory. There are other ways to go about generating an SQL dump file, you can do it from phpMyAdmin, or even from the SQL repl. By using wpcli, we’re simply exporting the database that we know for sure is being used by WordPress because just before it we used cd to change directories into the root folder of the WordPress install we’re trying to backup. wpcli uses the database credentials stored in wp-config.php to execute this command. And the final argument of the wpcli command saves the resulting SQL dump to our previously-created backup folder.
And finally, we used the tar command to create a .zip archive of everything inside the wp-content/ folder and save that in our backup folder as well. And ultimately, the idea is to create a single .zip archive that contains everything you need to start our website somewhere else. Knowing this, our folder structure is kind of awkward now. Our backup folder should look like this:
//backup folder
/opt/backups/
        |
        |-------> wp-content.zip
        |-------> backup.sql
So yeah, technically, this is really all you need to completely restore a WordPress site, but you’ll notice it’s actually not including WordPress core and the all-important wp-config.php. So in order to restore this site, you’ll need to download WordPress core as well as set up an new database and wp-config.php file. This is quite a lot of stuff to tackle for when the time comes to actually restore the backup your taking.
Additionally, suppose a bit of time passes after you take your backup and the WordPress team releases a major core update, and now you find yourself needing to restore a backup. Doing things this way would require you to download the latest version of WordPress which could potentially cause issues with some of the items located in wp-content/plugins or even wp-content/themes.
Small Advantage of Doing Backups This Way
If you’re pretty infrequently restoring backups (if ever), the odds of you encountering a real problem with WP core updates disrupting a restore are pretty slim. Additionally, only targeting the wp-content/ folder for backups allows you to only back up the main content of your site without having to save core files every time you do a backup. However, admittedly, this is a very small space-saving tactic, and is ultimately your choice and one of the advantages of rolling your own backup script with bash! We get to decide what we keep and what we throw away (or don’t make copies of).
Disadvantage of Doing Backups This Way
I would be disingenuous to say that this is the method described above is the best way to go about this, because as mentioned before, you could run into some problems at restore time, as it’s unfortunately common that WP core updates have been known to break websites because plugin developers weren’t ready for this core update, their plugin depended on some feature of WP core, and that feature was removed at the time core was updated, and the result broke the website.
In order to avoid this situation, you can optionally (and at this point, I would probably just go ahead and recommend this way) include the core files in your backup. To do this, you need to modify your tar command and your wpcli command to look like this:
//SQL dump directly into the root of the WP install instead of putting it in the root of the backup folder
//if no arguments are passed after 'export', the default action is to generate an SQL file in the same directory where you are running the command.

wp db export
This will put your WP database into the root of your WP install with a default name and timestamp. Next, you’ll just zip your entire WordPress director (database included) and place it wherever you want and name it how you like. To put it in your user’s home directory, just run
tar -cvzf ~/site-backup.zip /var/www/example.com/Additional Space-Saving Techniques
There’s another really cool feature of tar that we’re going to take advantage of in our script. It’s the -X option or --exclude-from option. If you’re familiar with Git, or have used version control before, you’ll likely be familiar with the .gitignore file. When using tar to create archives, you can using the -X option to essentially include your own ignore file to specify which files and folders you should exclude from your archive.
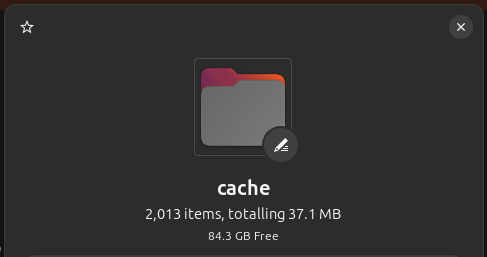
Why is this cool? Well, it’s common to find many WordPress installs using a caching plugin of some kind. This allows the server to save cached versions of various pages that visitors are requesting in improve overall site performance. For the purposes of creating a backup, there’s really no need to store this cache as part of our backup, especially since these cache folder can get quite large.

The above screenshot is just a small example of WP Fastest Cache running for a few weeks on a simple, low-traffic blog. Not much right now, but if you consider daily backups with even a max storage time of 10 days, this 37MB folder would quickly balloon to over 370MB across 10 daily archives, and that’s assuming the cache folder stays the same size for 10 days.
To exclude this folder (and others) we’ll need to create a small text file to tell tar which files and folder we’d like to exclude from our archive. You can name this file whatever you like, ignore.txt, exluded_files.txt, or even something more descriptive like cache_folders_for_tar_to_ignore.txt. But since you’ll be passing the name of this file to tar when you execute the command, the more concise, the better.
Inside the ignore file, let’s add a path to the cache folder we want to ignore. Keep in mind when defining file paths to exclude in tar, these file paths will need to be relative to the directory in which the tar command is being run. So for us, since we’ll be running tar from within the directory containing our WordPress install (/var/www/) we should have no problem.
inside /var/www/ingore.txt

wp-content/cache
With that added, suppose our WordPress site is located at /var/www/example.com and you’ve already exported your database.sql to the root of that install. To zip that entire site up, database and everything, but exclude the cache files located at /var/www/example.com/wp-content/cache/ you can run something like this:
cd /var/www/
tar -cvzf /opt/backups/example-backup.zip -X ignore.txt example.com
As tar evaluates this command, it’s going to take a look at /var/www/ignore.txt and know to ignore all our cache when creating this archive. Then it’s going to compress everything located at /var/www/example.com/ (except the cache folder) and copy it over to /opt/backups/example-backup.zip. Obviously, you can tweak this command to suit your own needs, but this exclusion feature of the tar command is very cool and pretty useful in our case!
Moving Your Archives Off-Server
Here’s the thing… Making regular backups of your site is pretty important. Lots of people use plugins to do this, and there’s lots of great plugins out there for doing just that. But here’s one of the biggest mistakes I see site owners do: They set that backups plugin to make routine backups… and they never move those archives off-server. Why? Simply put, lots of folks don’t put this much thought and energy into considering what a site backup is and does.
Unfortunately, I’ve come across many many WordPress sites that have a backup plugin, but it’s just saving tons and tons of backups to wp-content/ and the result is terrible. First, it’s not really making a “backup”. I mean, sure, it’s creating a copy of your website and creating an archive like we’ve been talking about… but it just stores it.. IN YOUR WEBSITE! So if your server goes down… so do all your backups!
The whole point of creating a backup archive like this is so we can move it off-server. There’s a metric ton of ways to do that, and we’ll get into that in my next post.
