If you’ve been following along last week, I wrote a tutorial on how to roll your own backups using a custom bash script. At the end of that article, you were essentially left with a script that squeezed your entire WordPress site into a tidy .zip archive, ready to store anywhere. Now it’s time to do just that!
Prerequisites
- Rclone
- Some kind of cloud storage (Google Drive, Dropbox, Backblaze, etc)
sudoprivileges on your web host server
For this tutorial, we’re going to be using an incredible tool called Rclone. If you’ve been following along for a while, you’ll know this isn’t the first time I’ve referenced Rclone on my blog. A while back I wrote about using Rclone to mount web servers like a hard drive, and it’s really an amazing and versatile tool.
Setup
First thing’s first, we’ll need to make sure all your packages are up-to-date. I’m using an Ubuntu box, so it’s just a quick command, but if you’re on a different distro, use your appropriate package manager.
sudo apt update && sudo apt upgradeWith that out of the way, it’s time to install Rclone. Rclone has its own installation script which you can just pipe directly into bash. Just be aware, it’s not safe to pipe random scripts directly into bash (especially if you don’t know what the script is doing or where it’s from) but since Rclone is a trusted source, we can go ahead and run the install script provided in the official documentation.
sudo -v ; curl https://rclone.org/install.sh | sudo bashIf this doesn’t work for you, or if you’re running a different operating system, you can always check out the installation instructions in the official Rclone docs. https://rclone.org/install/
Once your installation is complete, you should be able to run man rclone and see the manual page for Rclone. If not, try reinstalling or try a different method if that didn’t work.
Connecting Your Cloud Storage
These steps will vary pretty wildly, depending on which storage provider you’re with and what they require in order to get set up with their platform. For this tutorial, I’m using Backblaze B2 bucket, but you can follow the dedicated configuration instructions for your cloud provider. Again, all of this information and more can be found in the Rclone docs.
The first step for everyone, regardless of provider, is actually starting the configuration process with the rclone config command.
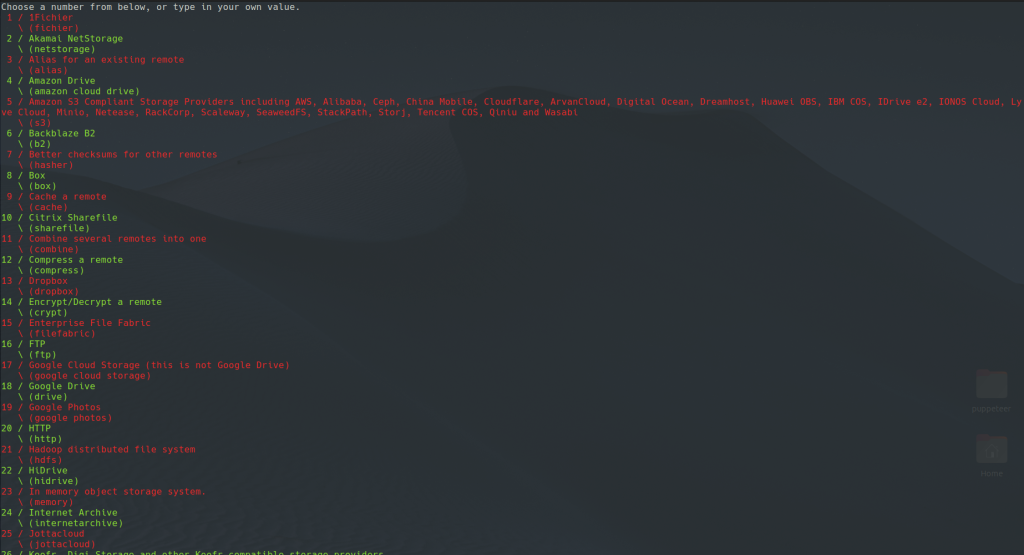
Once you’re in, you will be prompted to choose your cloud storage provider. As you can see, there are TONS of options.

Yes, it scrolls. In my case, since I’m setting up for Backblaze, I’m going to choose option 6, but again, you will choose whichever provider you like.
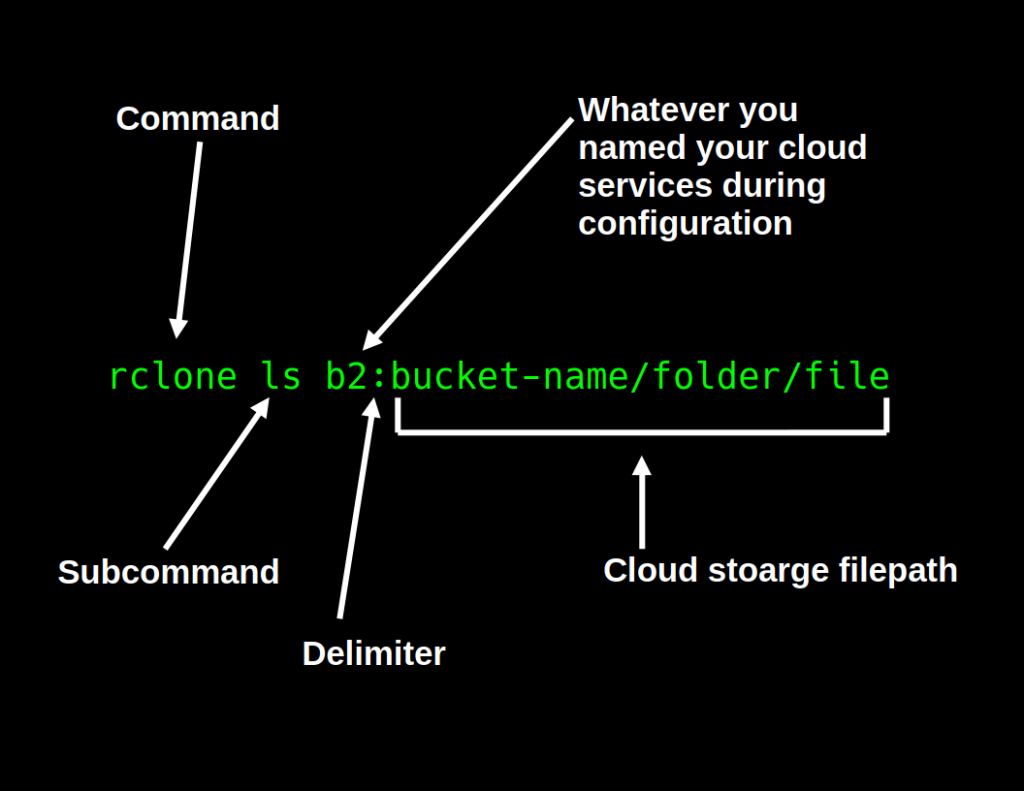
Next, you’ll be prompted to name your configuration. This is important to keep in mind, as we’ll be using this name in our command every time we want to interact with this cloud storage. That said, I like to keep my names as short and descriptive as possible to keep typing to a minimum and prevent typos from giving me grief.
Once my provider is selected, I will provide my account ID and then my application key. Once those two pieces of information are provided, I can then choose a handful of various options as to whether or not I want to be able to “hard delete” from this application, etc, etc, the default options are pretty good to use for all these questions.
A Note About The Rclone Command Format
At this point, you should be good to go! If you’ve configured your cloud storage correctly, now when you type rclone config you should see the name of the storage that you previously configured. Great work! At this point, now we’re ready to get familiar with a few of the basic Rclone commands and the way that Rclone works with Backblaze.

For our purposes, every part of the command will essentially stay the same except for the subcommand. There are a handful of subcommands you may find useful such as:
ls= List everythinglsd= List only the directoriesdelete= Delete everything in the following pathdeletefile= Only delete this one specific filecopy= Copy everything in this path to the next provided path, skipping identical filescopyto= Copy just this one file
Awesome, Now What?
Now that you have Rclone installed and configured to be used with your favorite cloud storage solution, we’re ready to move that .zip archive off to be stored! To do this, we’ll be using the last subcommand as mentioned above.
copy is a really cool in that you can use it to recursively copy large directories from one place to another (very useful), but in our specific case, if you were following the previous tutorial, we only need to copy a single .zip archive up to cloud storage for safe keeping. To do this, we’ll be using the copyto command. The format of the copyto command is like so:
rclone copyto /path/to/archive.zip b2:/path/to/backup/storageFor testing, if you’re just wanting to test your syntax and make sure you have everything correct before actually carrying out the copy command, you can append the --dry-run flag at the very end like this:
rclone copyto /path/to/archive.zip b2:/path/to/backup/storage --dry-runAnd that’s it! Another flag you can use for your own purposes, especially if the archive is pretty hefty, is the --verbose and --progress flags. These flags will give you more output and update you with various stats such as upload completed percentage, data transfer rates, and more. Again, just optional cool stuff to keep an eye on progress.
And That’s It!
Now you have everything you need to add the rclone command to your backup bash script. Now by executing a single file, you can roll up a copy of your website and ship it off to be stored for later! In the last part of this little blog series, we’ll go over exactly how to automate the execution of your backup script and how you can customize your very own running schedule so you can have backups make themselves whenever you want! Thanks for reading.
