If you’ve followed me for any amount of time, you’ll know that I’m most likely addicted to Raspberry Pis. They can be used for SO MANY things. It’s really just incredible how much you can learn from tinkering with a pi.
A little bit of context
I recently set up a new NVR security camera system, and I’m really loving figuring out how it all works and learning all the features of it. So far, I’m really pleased, that’s probably going to be it’s own post before long, but regardless, I need a way to monitor these cameras when I’m outside my own home network.
Yes, yes, I know a bunch of doorbell cams and all that allow for remote monitoring, download the app, and all that. Here’s the thing. One of the requirements for my camera system was that it did NOT require a cloud subscription and/or creating a manufacturer’s account in order to use the system.
That said, I just feel a lot better if it’s a system that I set up myself and it’s on infrastructure/hardware that I have exclusive access to. If I end up sharing access, it’s because it’s something I decided to do myself and I define how access is shared.
So finally, that brings us to the need for a VPN and the need for the VPN to be hosted locally, the network upon which my cam system is currently running. There’s a handful of ways to access the cams (manufacturer or otherwise) and after a bit of research I opted for doing my own VPN because that seemed to make the most sence for my particular scenario and use case.
The Setup
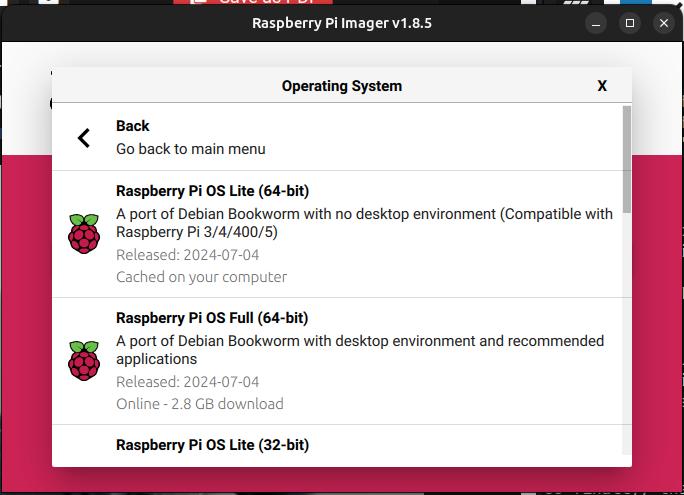
I decided to re-purpose a pi that was previously running PiHole (and working great). So in order to just have a fresh start, I went ahead and flashed a fresh image of Raspberry Pi OS Lite (64 bit), which I’ve really enjoyed using lately. Since I’m not using some of the more traditional desktop doodads (browsers, music players, keyboard/monitor setups, etc) I don’t need all the extra packages, drivers, and software required to make a full-on desktop OS. So the lite version has been perfect for just getting up and running as quickly (and lightly) as possible allowing me to only install the packages that I’ll actually be using.
Step 1: Pi Setup

If you’re using the Raspberry Pi Imager (screenshot above) then you’ll also receive the options to set your own username, non-default password, enable SSH, setup wifi credentials (if needed, but not recommended for this application) so all you need to do is flash the SD card, plug in your Pi, and it will be immediately accessible the moment it boots up and comes online. Pretty sweet!
Step 1.5: Port Forwarding
Make sure your pi has a static IP address (the pivpn script in the next step should help ensure this) and that your router is forwarding to your Pi. If you don’t do this step, your Pi won’t be accessible from outside the network and that will basically defeat the entire purpose of this particular setup.
Step 2: PiVPN
Before we go any farther, because this is a brand new Pi OS install, it’s always a good idea to run:
sudo apt update && sudo apt upgrade
For this setup, we’re gonna be using PiVPN. It’s a really awesome Bash script that will get you all set up in a super-easy, relatively painless series of prompts. Typically, it’s good practice not to pipe random scripts directly into bash (especially if you don’t know what they are and/or don’t know what they do), but because this is a trusted source, we’re literally following the first installation method, which does just that.
curl -L https://install.pivpn.io | bash
This will download the latest pivpn release and run the script right on your pi.
Step 3: Add User
Once pivpn is up and running on your pi, add a user with pivpn add and that will prompt you to enter in a user/client/device name as well as a (good, strong) password. Once you’ve done that, a new user will be generated and a new .ovpn file will be generated in your home directory. Almost there!
Once your .ovpn file has been generated, you’ll need to transfer that file to your client (the phone, laptop or other device you’ll be using to remotely connect to your Pi VPN with). With the file transferred, you’ll need to install the OpenVPN client. The client can be found at https://openvpn.net/client/
Step 4: Connect
Now you’re ready to connect. On your client device outside your home network, open the OpenVPN client and import the .ovpn file you brought over earlier. This is your connection profile. It contains all the data you need to securely connect to your VPN. It’s very important that you protect this file. If anyone else were to get this file, they too could connect to your VPN and potentially do some serious damage.
After the file is imported, flip the switch to connect!
